
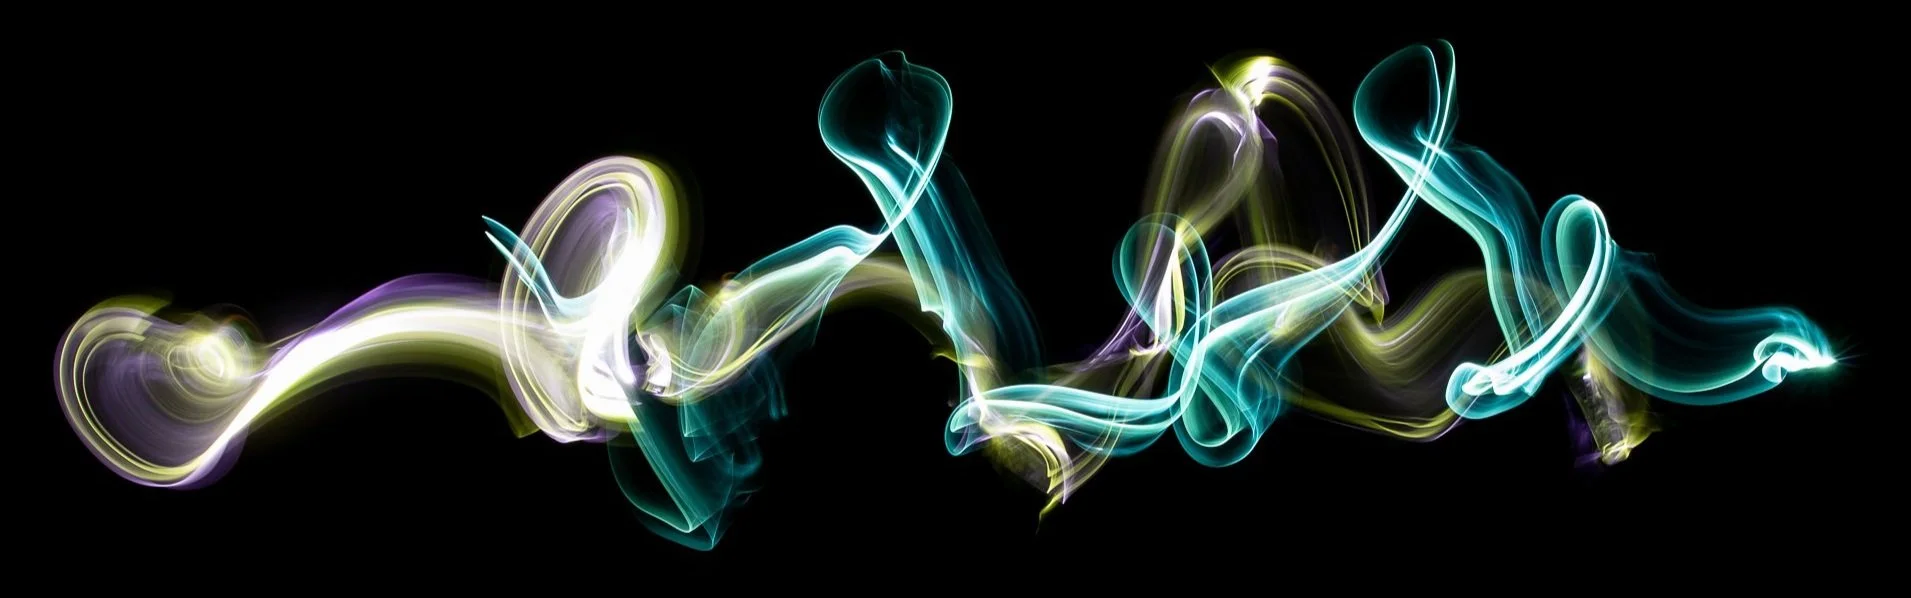
Tracing Light
Rewind back to early 2015 when I was searching for a way to use my photography a bit more creatively and I stumbled on the world of Light Painting. It was a fresh feeling of discovery but I didn’t really know how I would explore it.
A couple of years earlier I had returned to Martial Arts training after a twelve-year hiatus due to an industrial accident. I had started again with my original instructor at white belt. This was a deliberate choice as I was no longer the same student, I had somewhat matured and grown as a person so my journey was going to be different, for the better.
Brainstorming a link between Light Painting and Martial Arts I remember typing these words into Google and at the top of the results was a whole bunch of art by Patrick Rochon. He was using Light Painting and movement to create his popular Light Blading Kata. This inspiration saw me build my first set of light blades and start on this journey.

Very early Light Blading

Original 2015 DIY blades with acrylic colour change
I met Patrick in 2018 in Melbourne, where he shared a technique with me called Tracing Light. It is a Light Blading technique where you create with a partner - you connect with them by following each other’s light. Their energy matches yours and vice versa as you move back and forth. The resulting image is an intertwined ‘Trace of Light’. A moment in time of connection.

Tracing Light with Patrick Rochon 2018
Also in 2018 I started capturing images at the annual Benny ‘The Jet’ Urquidez Martial Arts seminar held here in Adelaide and across Australia. Every year it is a pleasure to catch up with Sensei Benny. Last year over dinner we chatted about how I use Light Blading as a meditative energy flow. He was excited to learn more, so I offered to show him on his return this year.
Imagine standing in a dark alley at the back of a restaurant in southern ‘burbs of Adelaide connecting with such a legend via Light Painting…it still makes me smile.

Sensei Benny “The Jet’ Urquidez
6-time world Kickboxing champion
5-time world Karate champion
Movie Star
Stunt Coordinator
LIGHT PAINTER!
Sensei Benny in action - Martial Arts moves, American Indian chants and Light Painting
“Light connects you to other dimensions”
Patrick Rochon
With Sensei Benny- Tracing Light- right to left

With Sensei Benny- Tracing Light- left to right
This year marks eight years of Light Painting for me. 90% of my Light Blading is done in my studio and not outdoors. Studio work is where it flows, a movement that is meditative. Images created in this space are also void of distraction, only the trace of light remains.
Pure flow is a fusion between action and consciousness.


**Light Blading is a form of Light Painting where acrylic/plexi or glass is attached to a light source and used to create unique ‘ribbons’ of light, captured during long exposure photography.

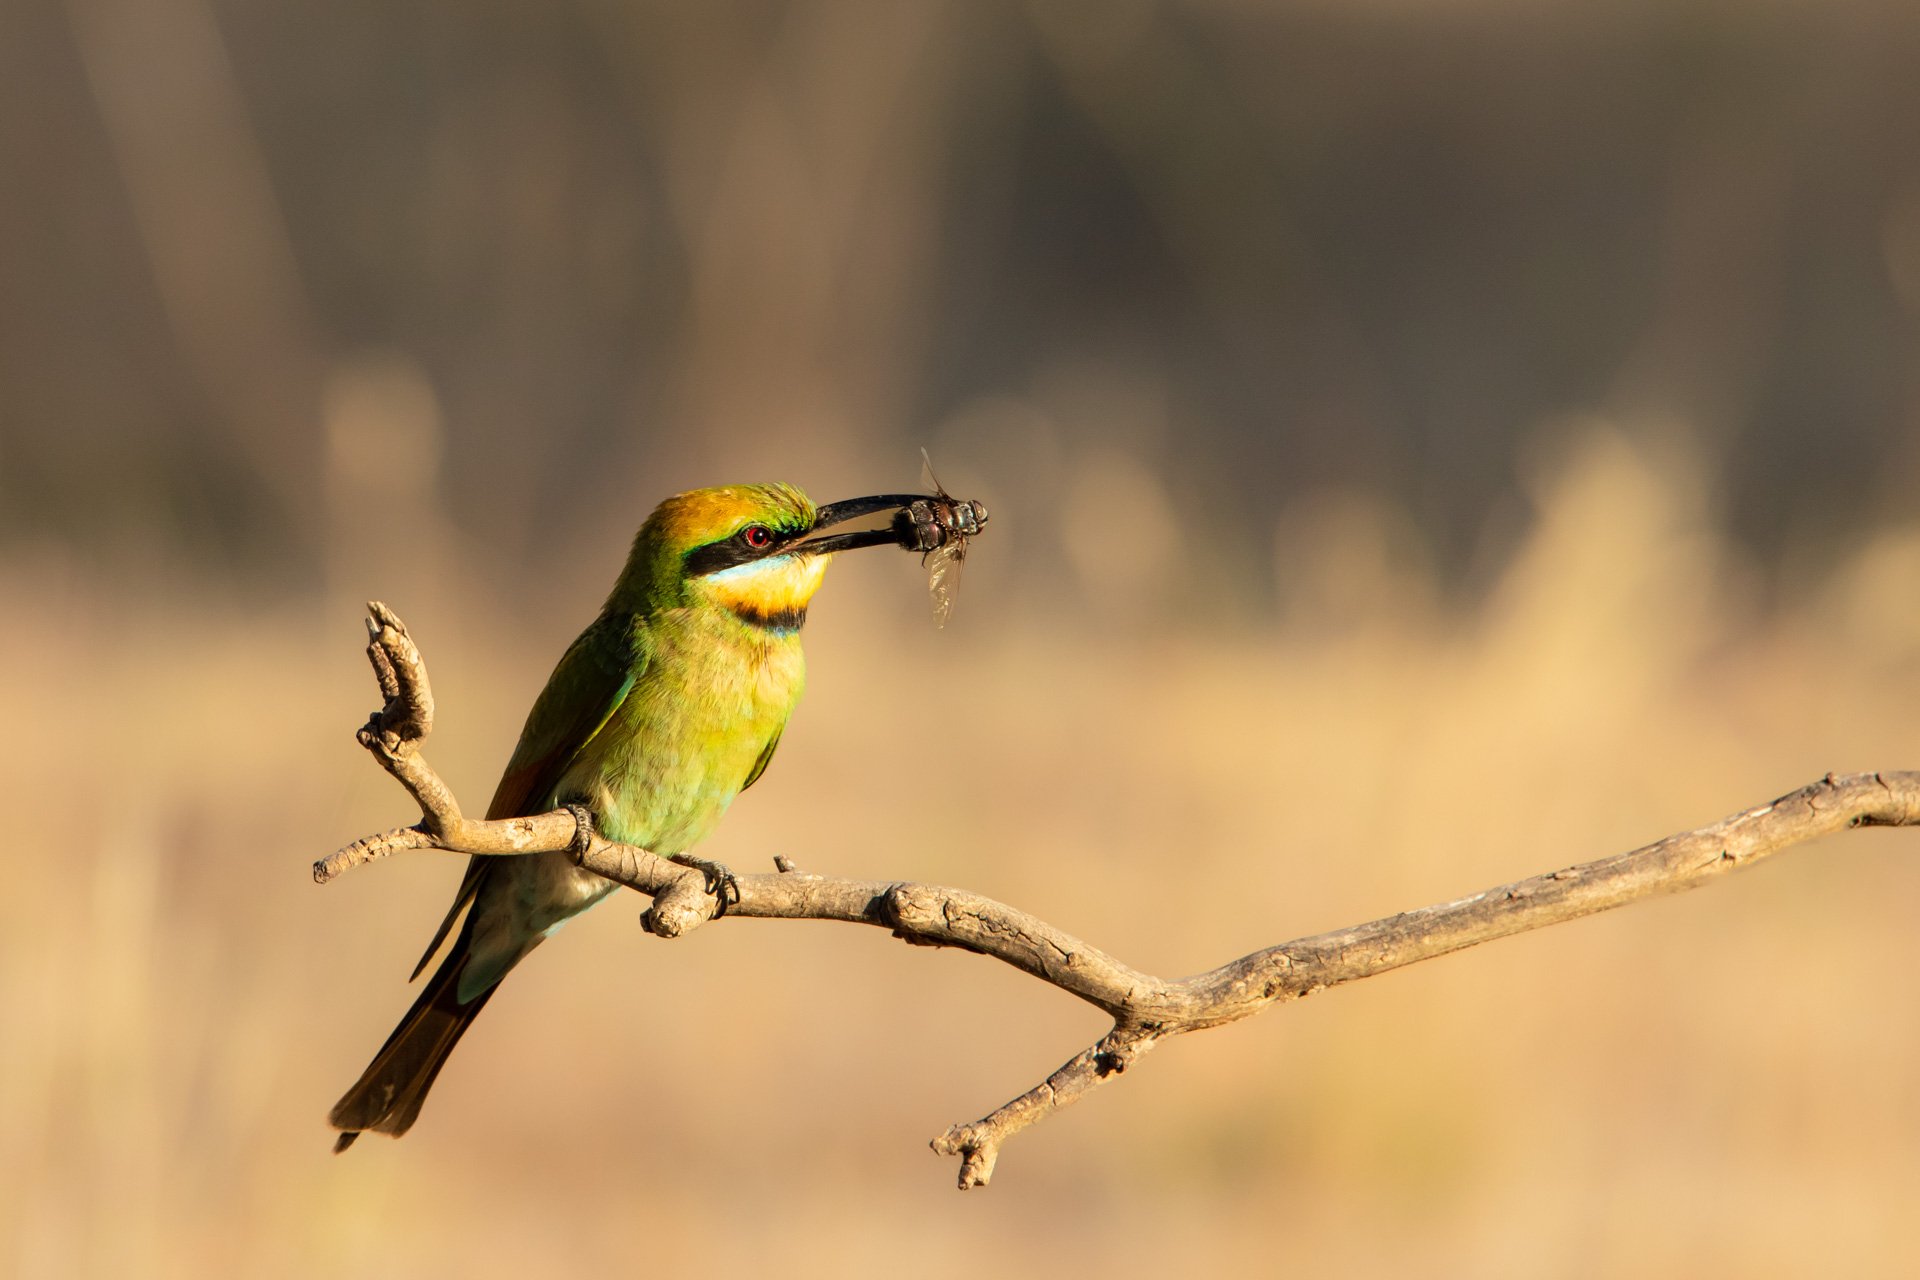
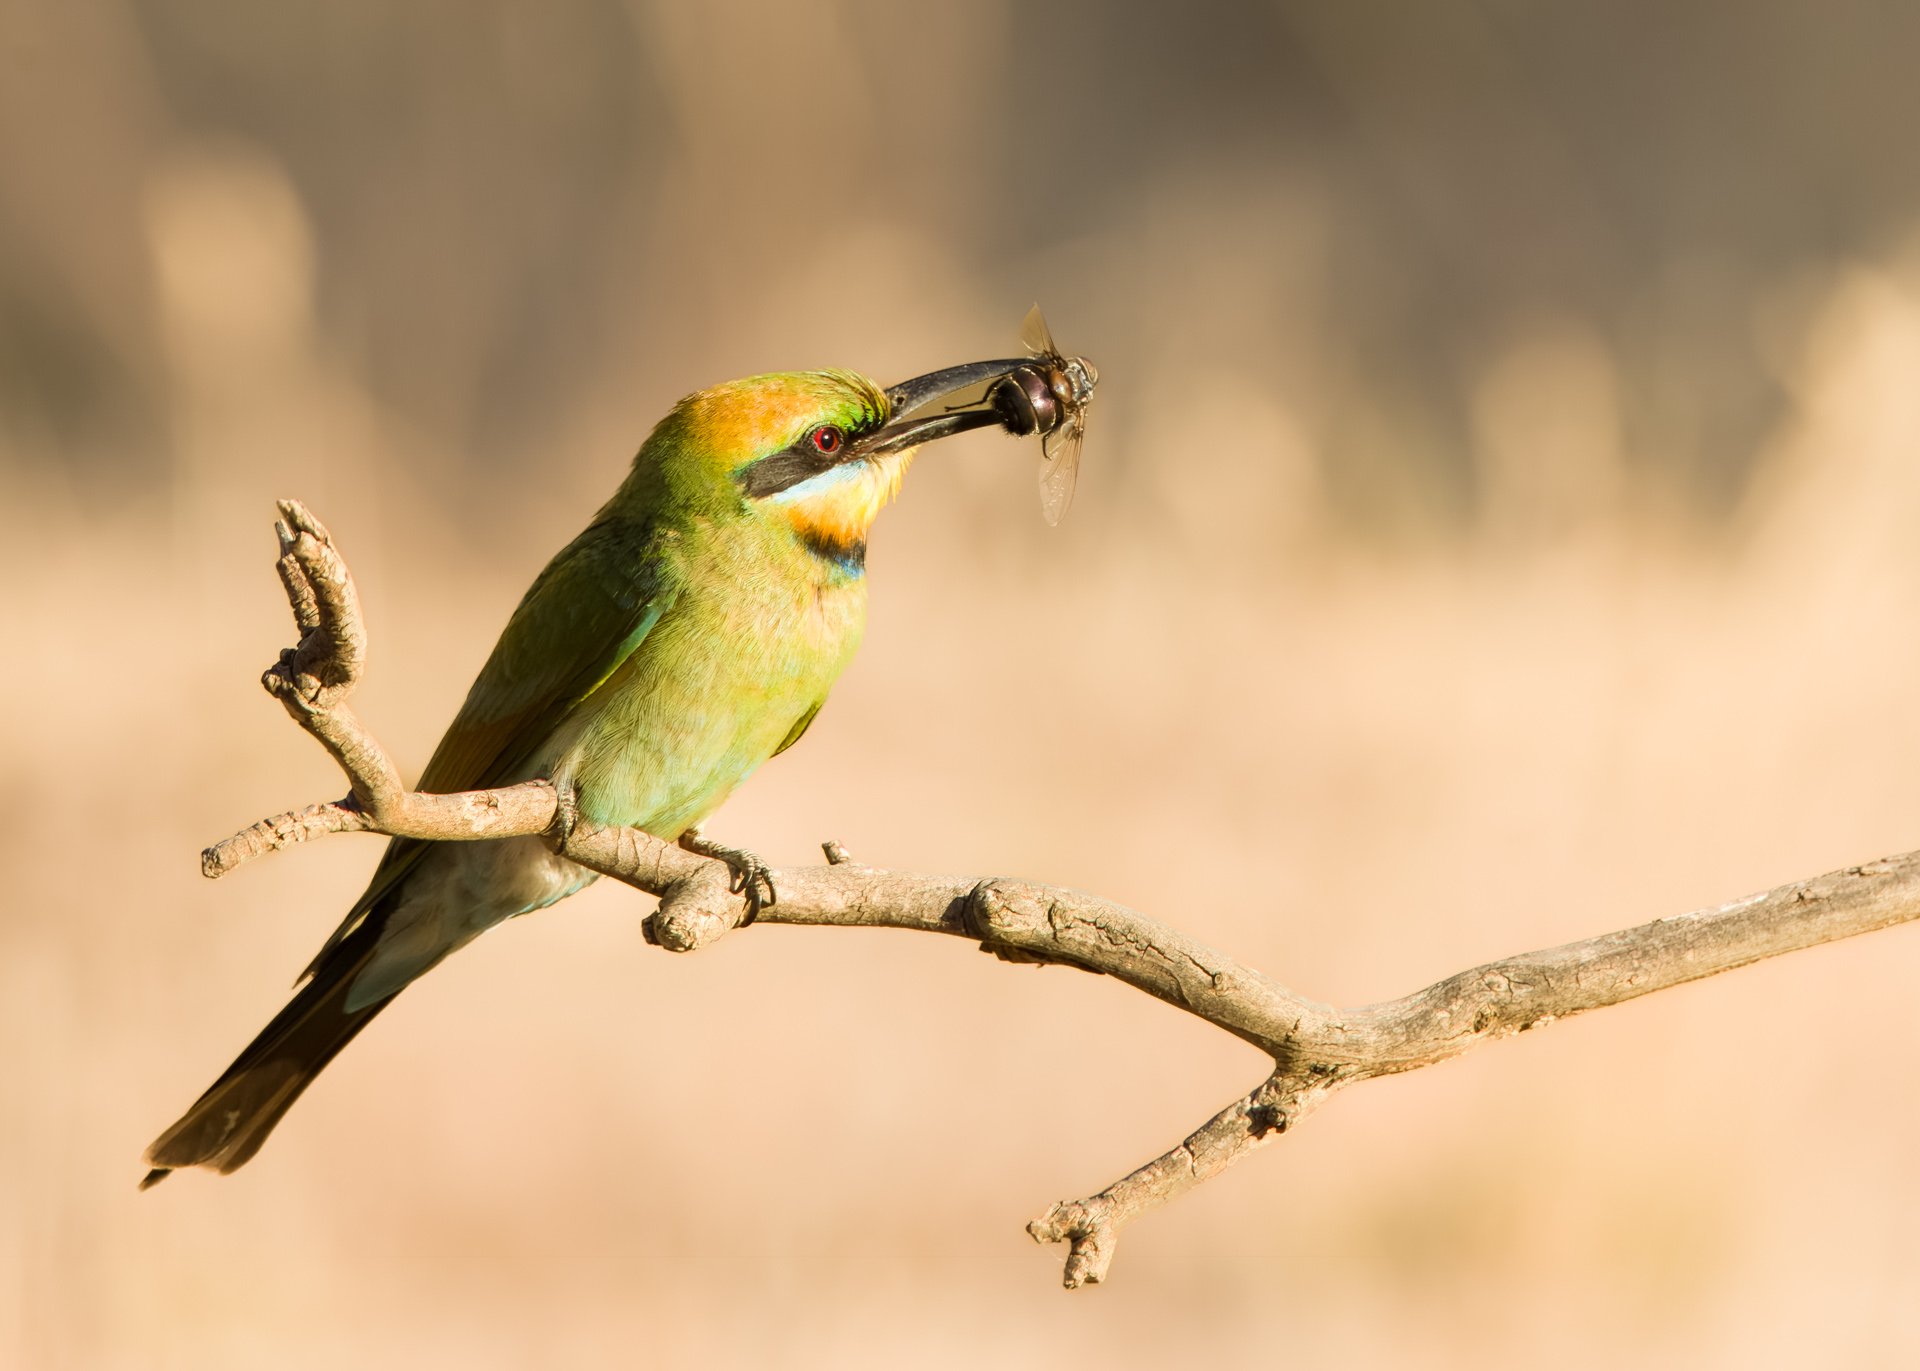
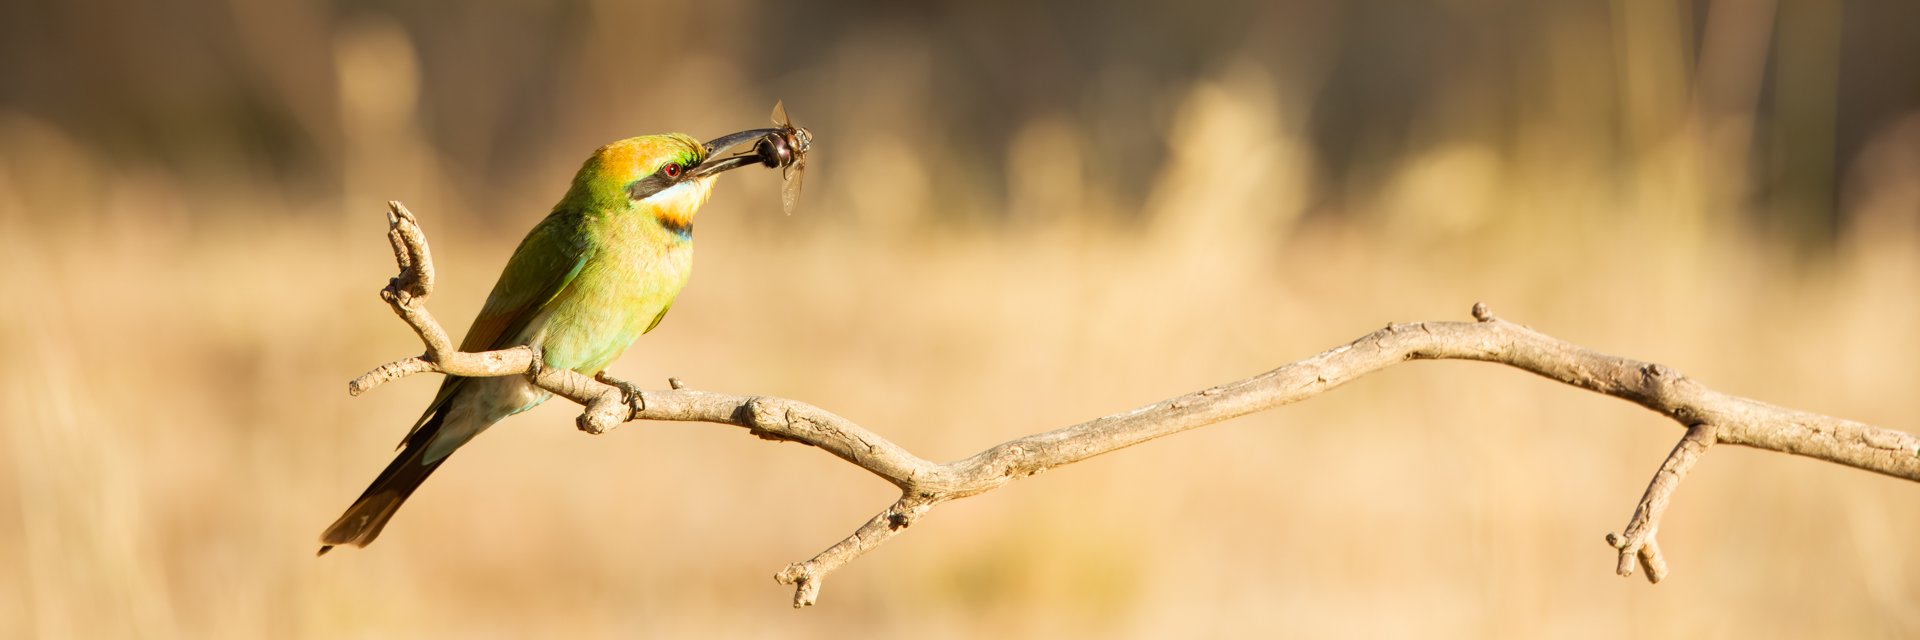
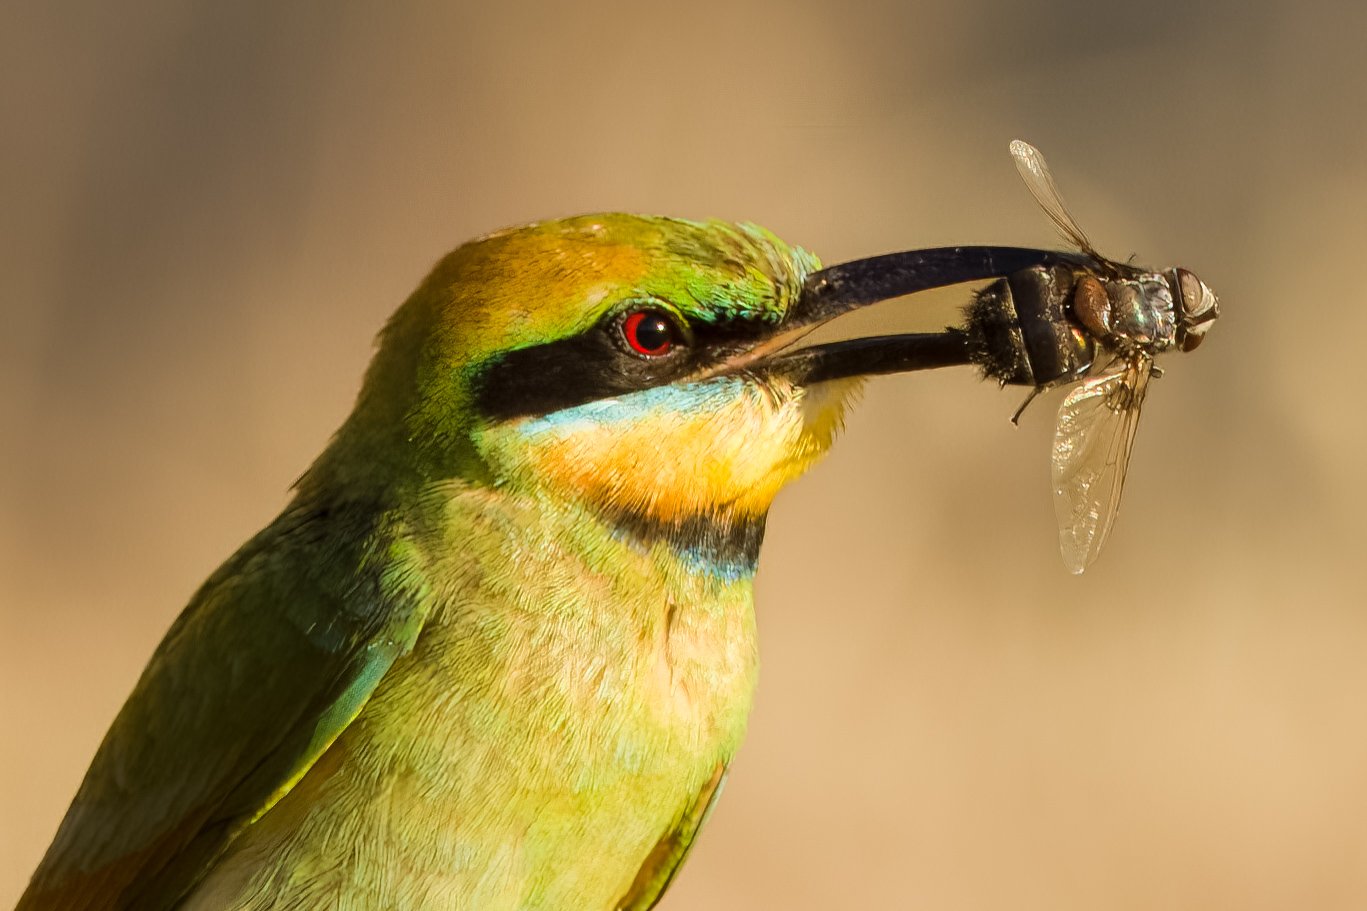
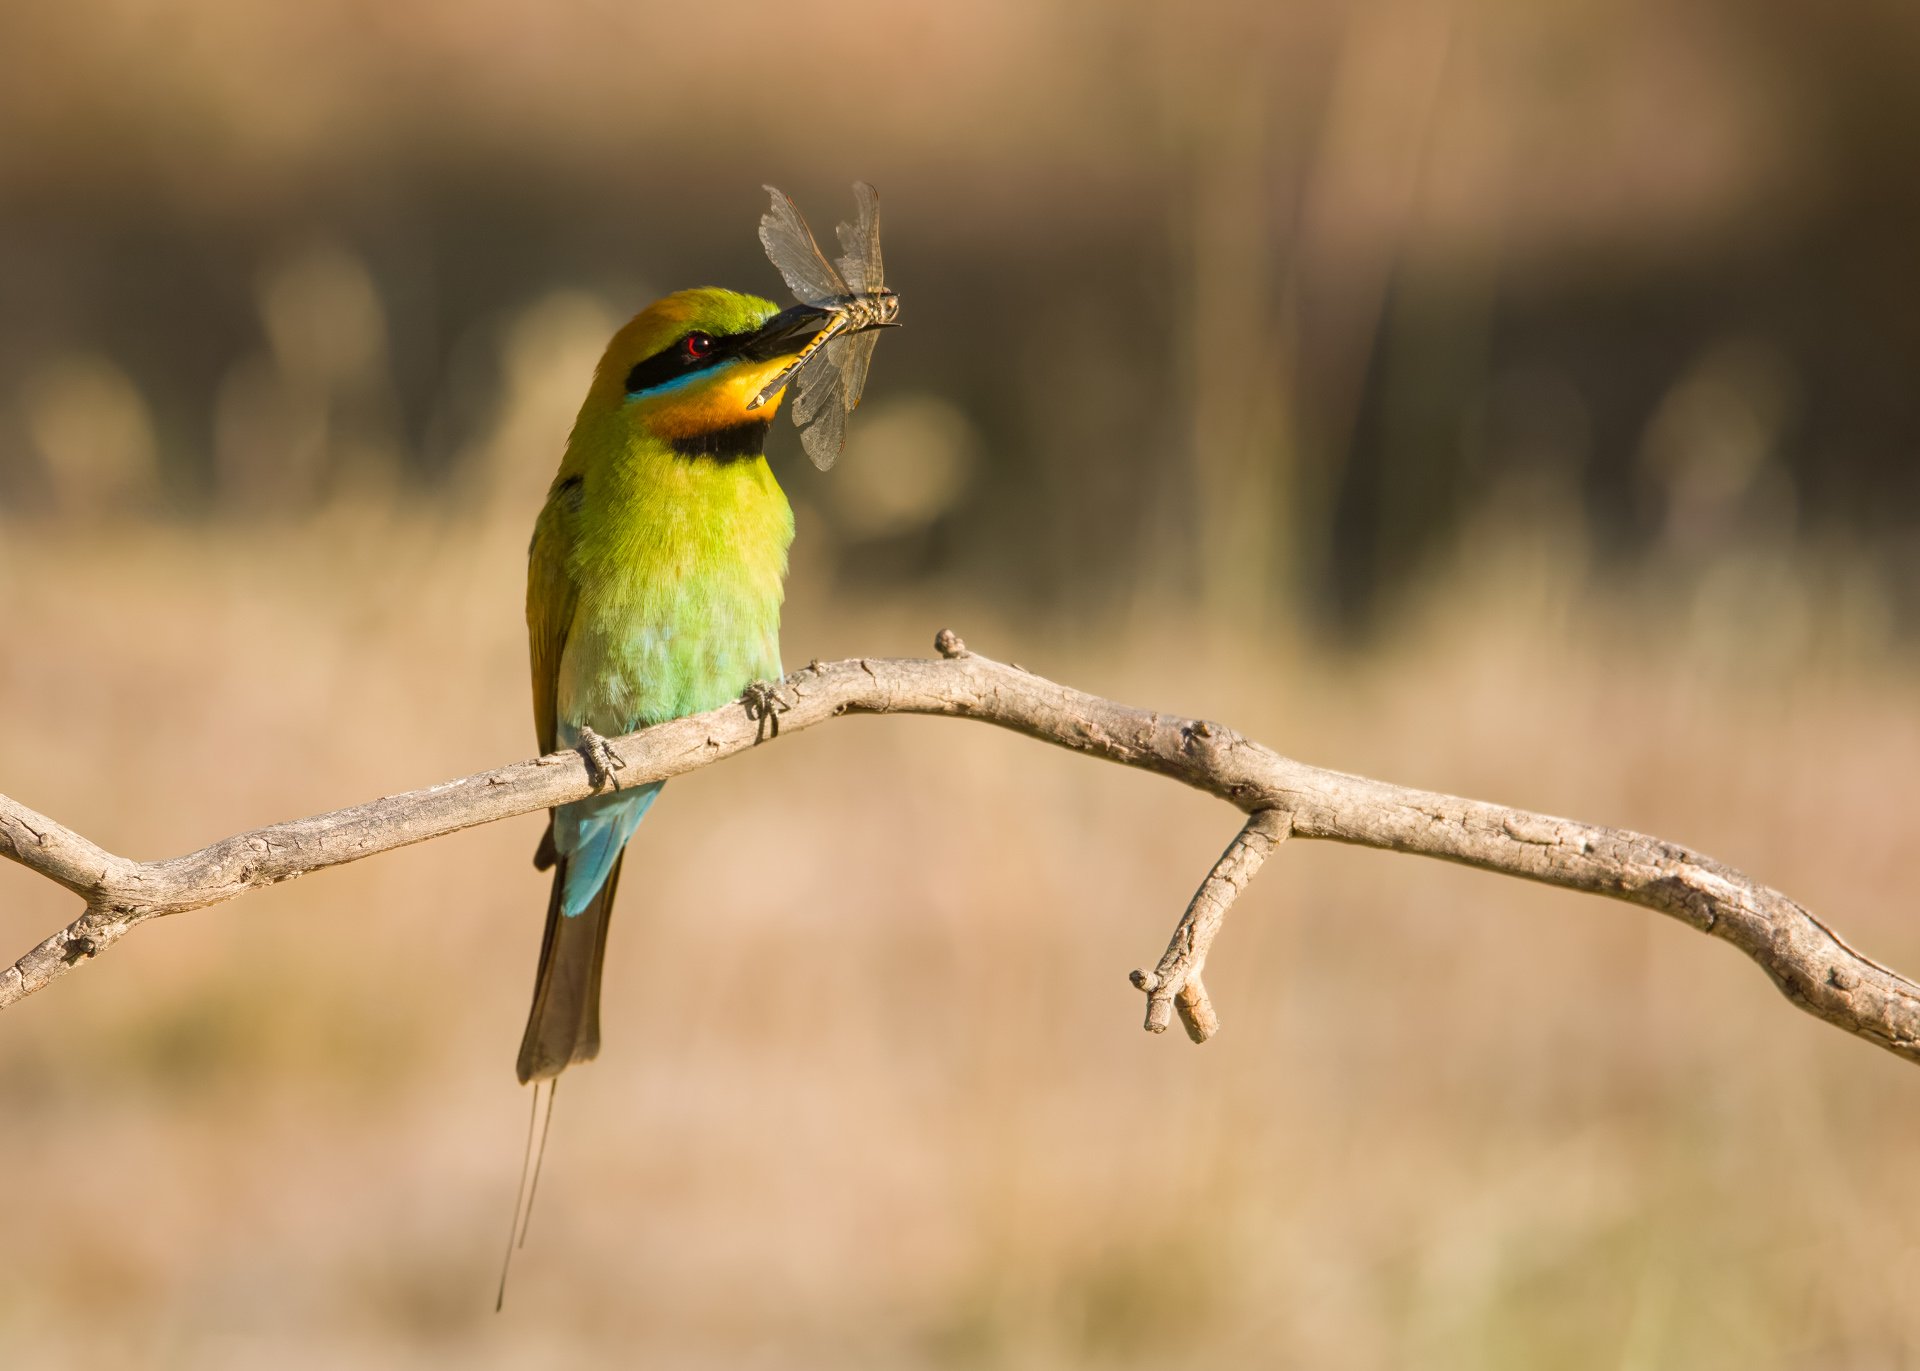
Chasing Rainbows - Merops ornatus
Having an appreciation for nature allows me to understand the beauty and complexity that surrounds us in the natural world. Sitting still, observing and capturing images of these moments allows me to gain a deeper connection to nature and this process has become a form of meditation for me.
I have never purposely gone birding before, interactions with nature have always been somewhat accidental and a fleeting moment of two paths crossing. These interactions are sometimes captured if I have my camera…
One little bird has fascinated me for several years, twice managing a fleeting glimpse in the wild, both times without my trusty camera. They are fast! Like little colourful bullets, and with both previous sightings it was their sudden flight that alerted my to their presence.
I knew I had to capture some images of these… eventually.
This passion for nature sees me following several wildlife photographers from around the world. Imagine my joy when one of these guys announced 'Bee-Eater Sessions’. It was local, it was soon...I was in!
The session was early morning. Alarm set for 3am, out the door for the 45 minute drive, and meeting on a dirt road in the Barossa Valley at 5am.
A quick briefing and invaluable chat about Bee-Eater behaviour, and it was off to get set up in the individual purpose-built bird hides.
Set up near a couple of nests, they are there to allow us to be relatively close without any disturbance to the birds at all.
Set up and focused on a nearby perch, it was time to sit back and wait. The anticipation and excitement was high. I knew that this was it; it was time to tick off this wonderful bird from my bucket-list and hopefully capture some sharp images. I had to relax a bit and just breath.
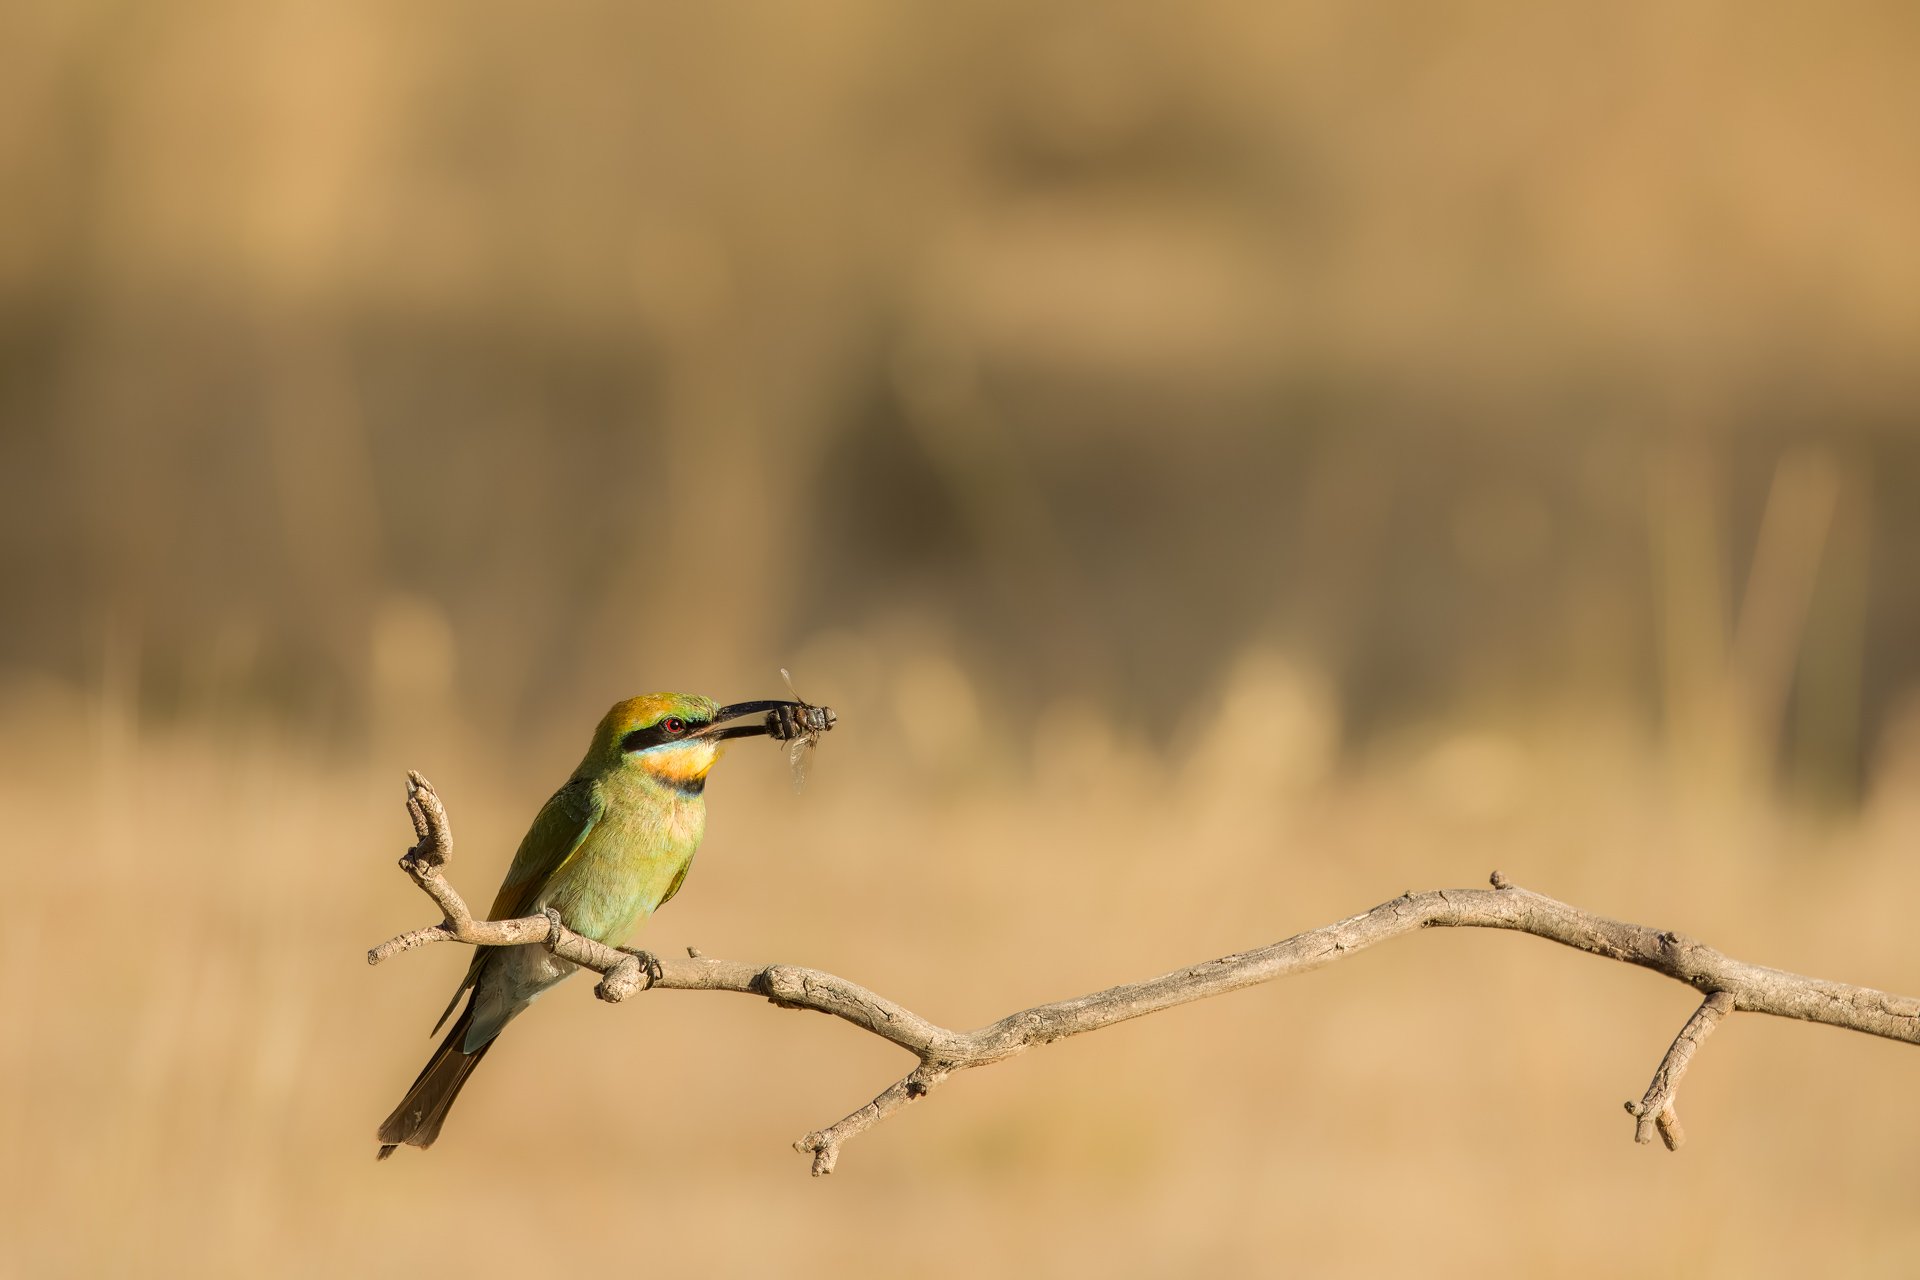
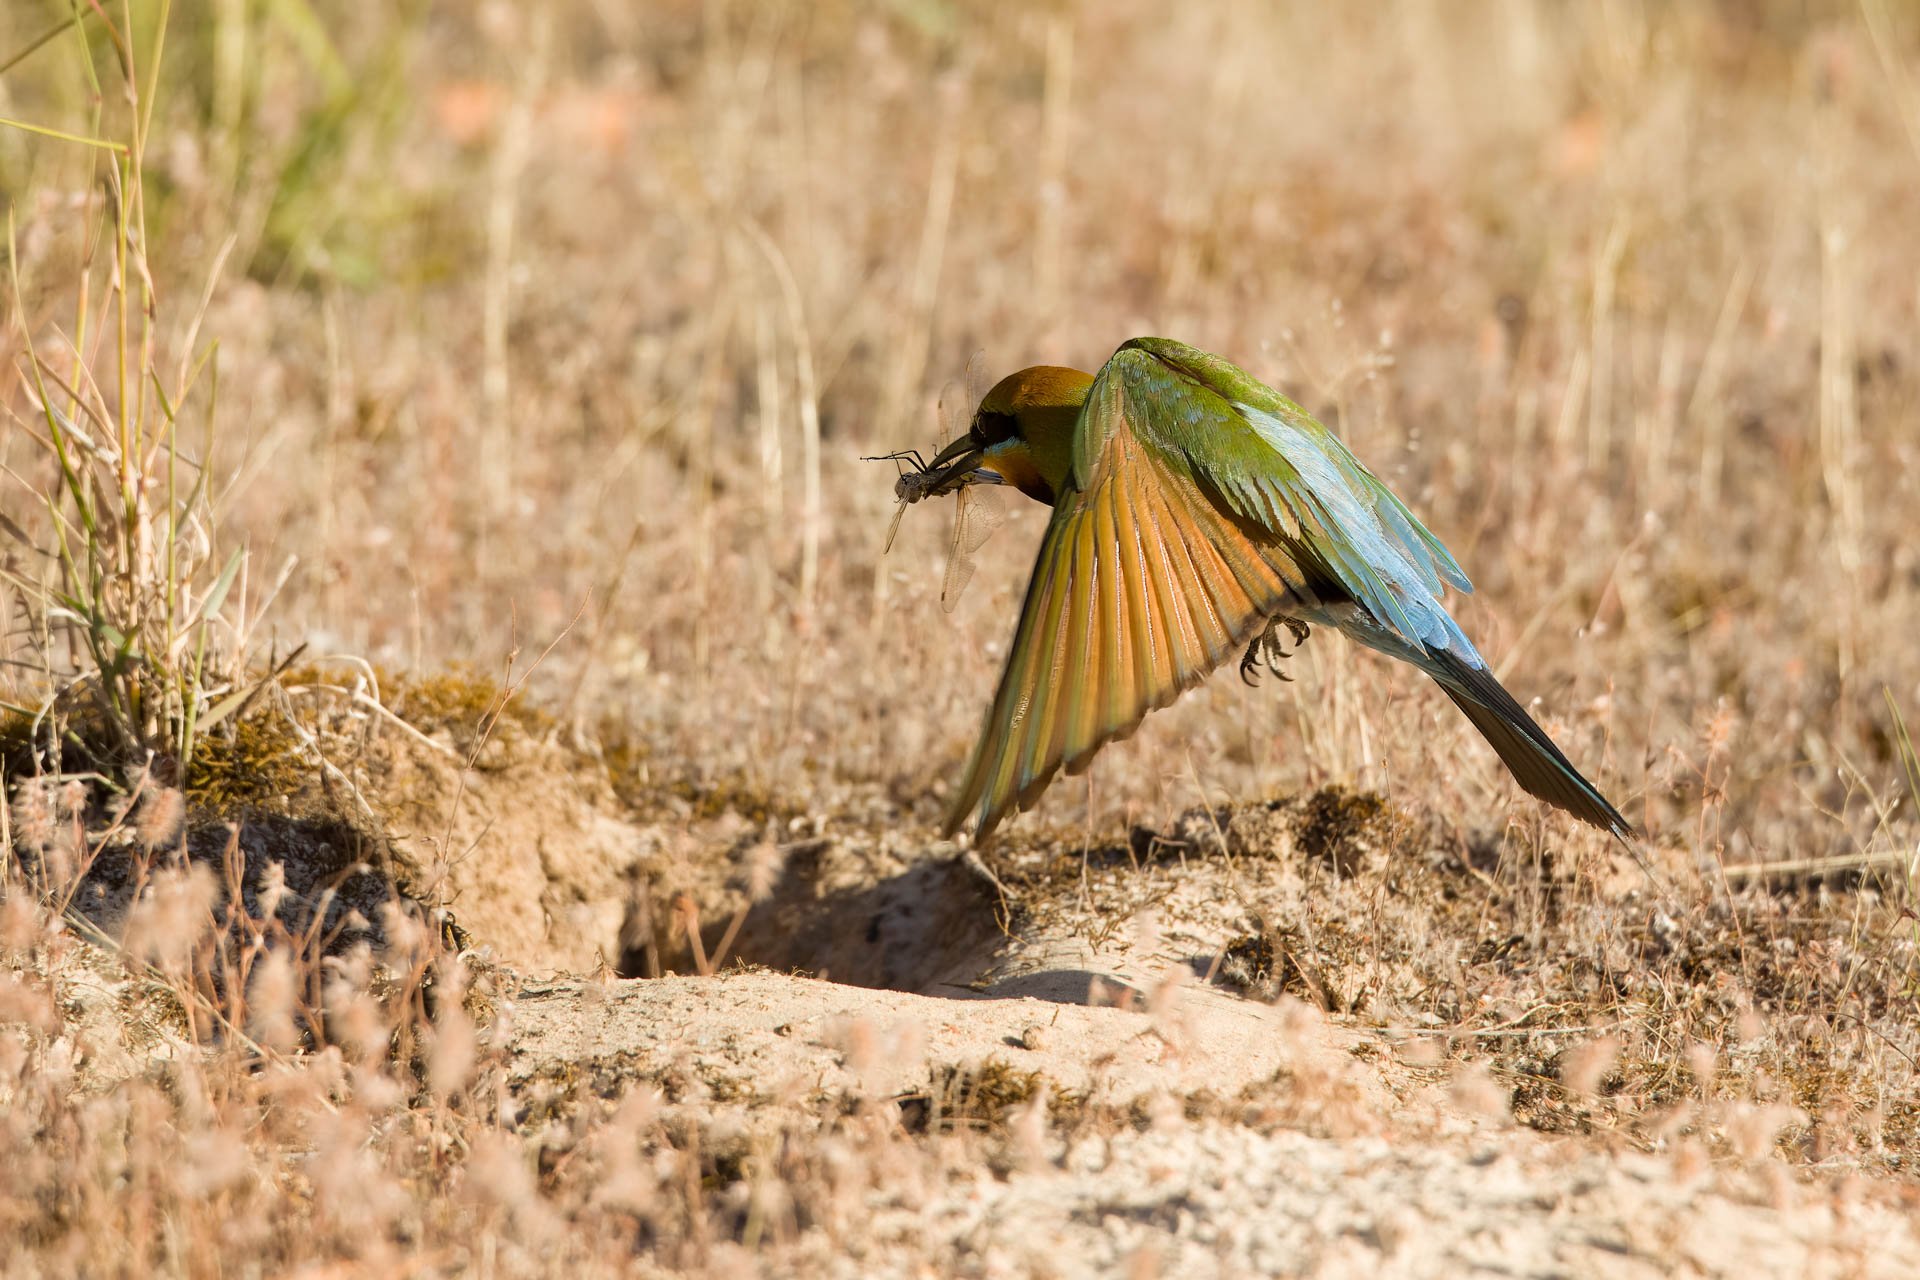
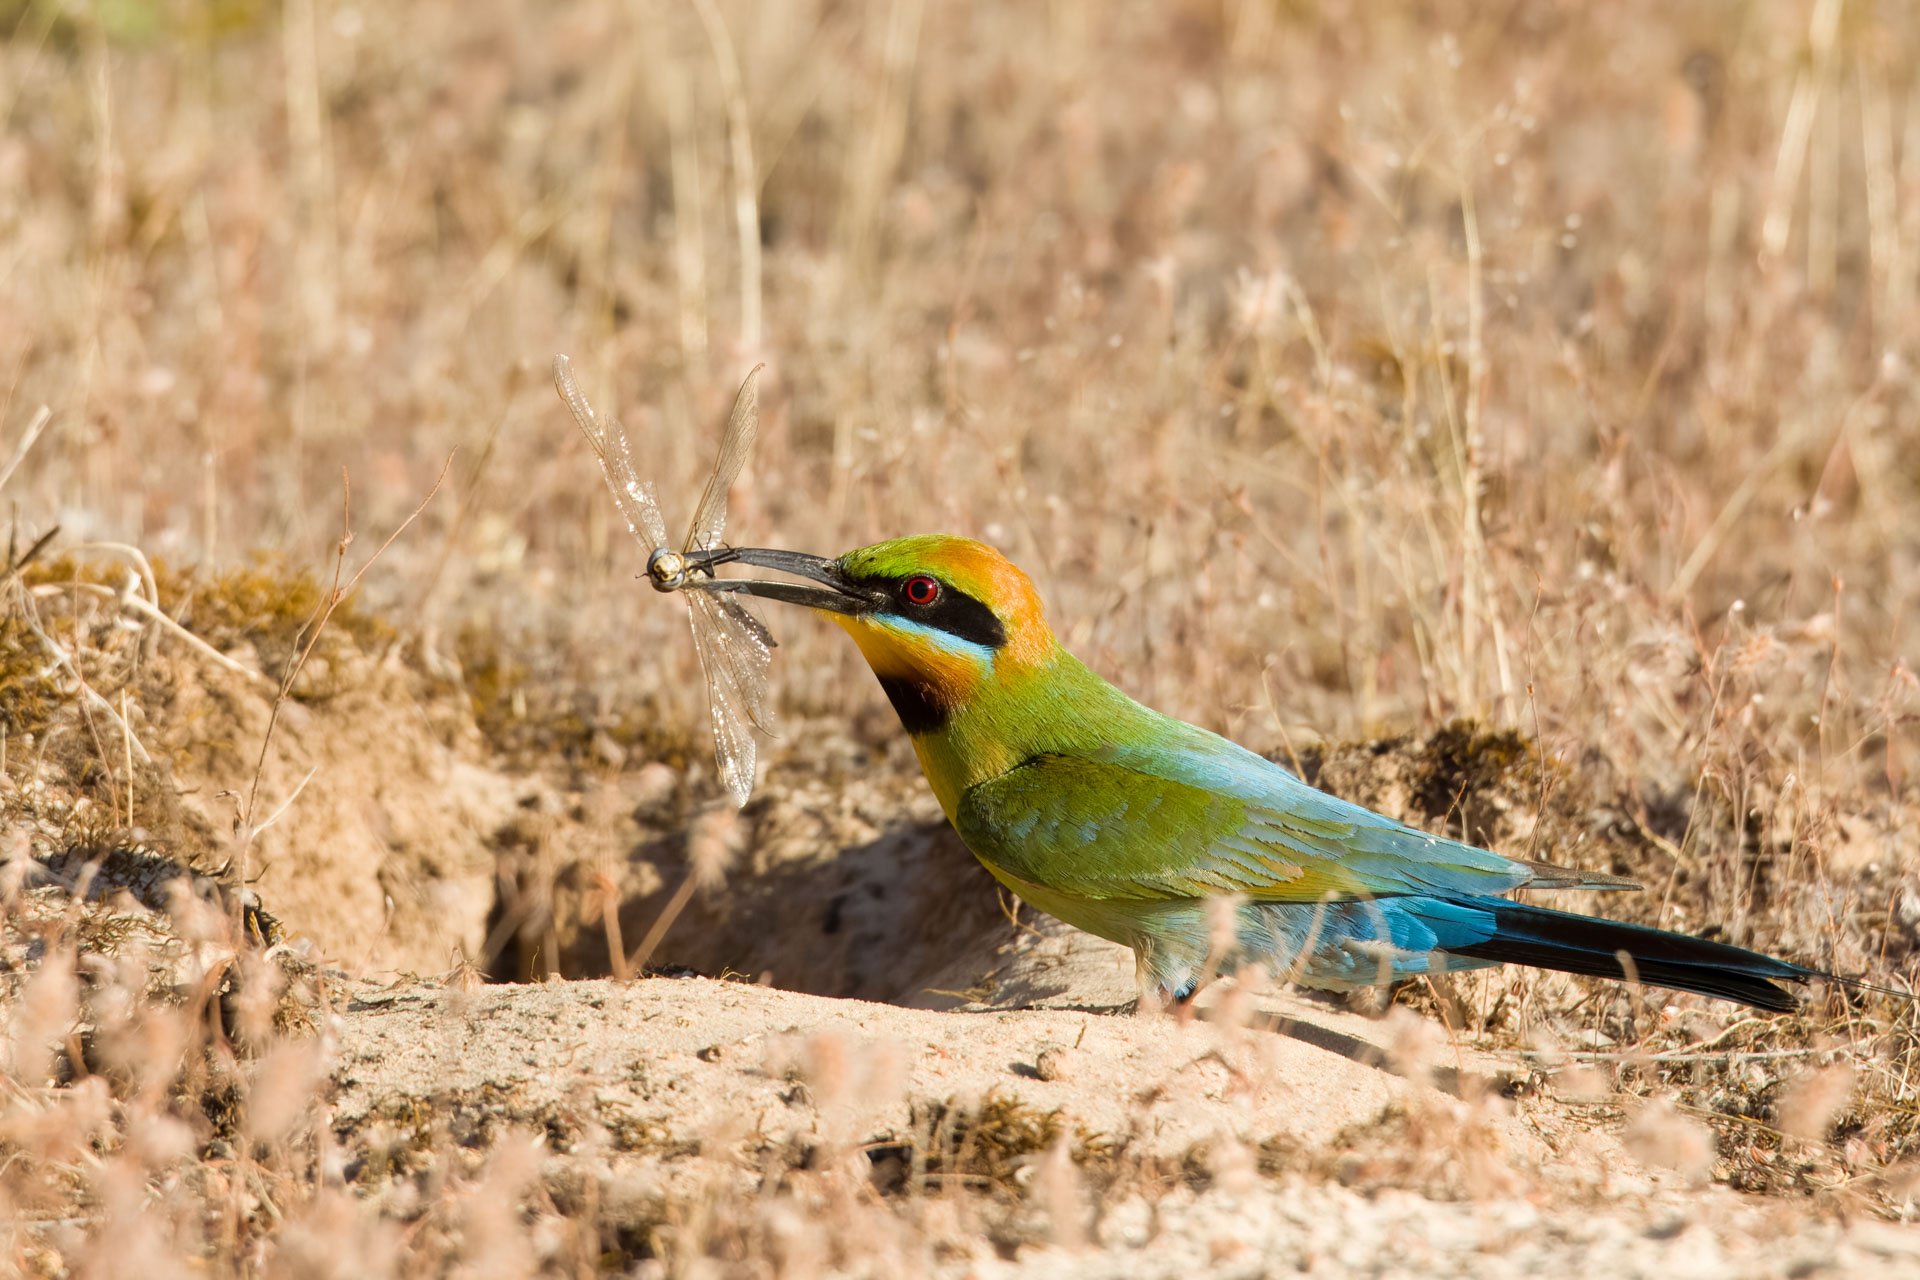
We were all set up and in the hides before the Rainbows became active. It didn’t take long. I was sitting, knowing my camera was focused and ready to go, my eyes shut and in a relax mode, just waiting…’click, click, click click’ it was the familiar shutter sound coming from the fella in the next hide. The rainbows were out…
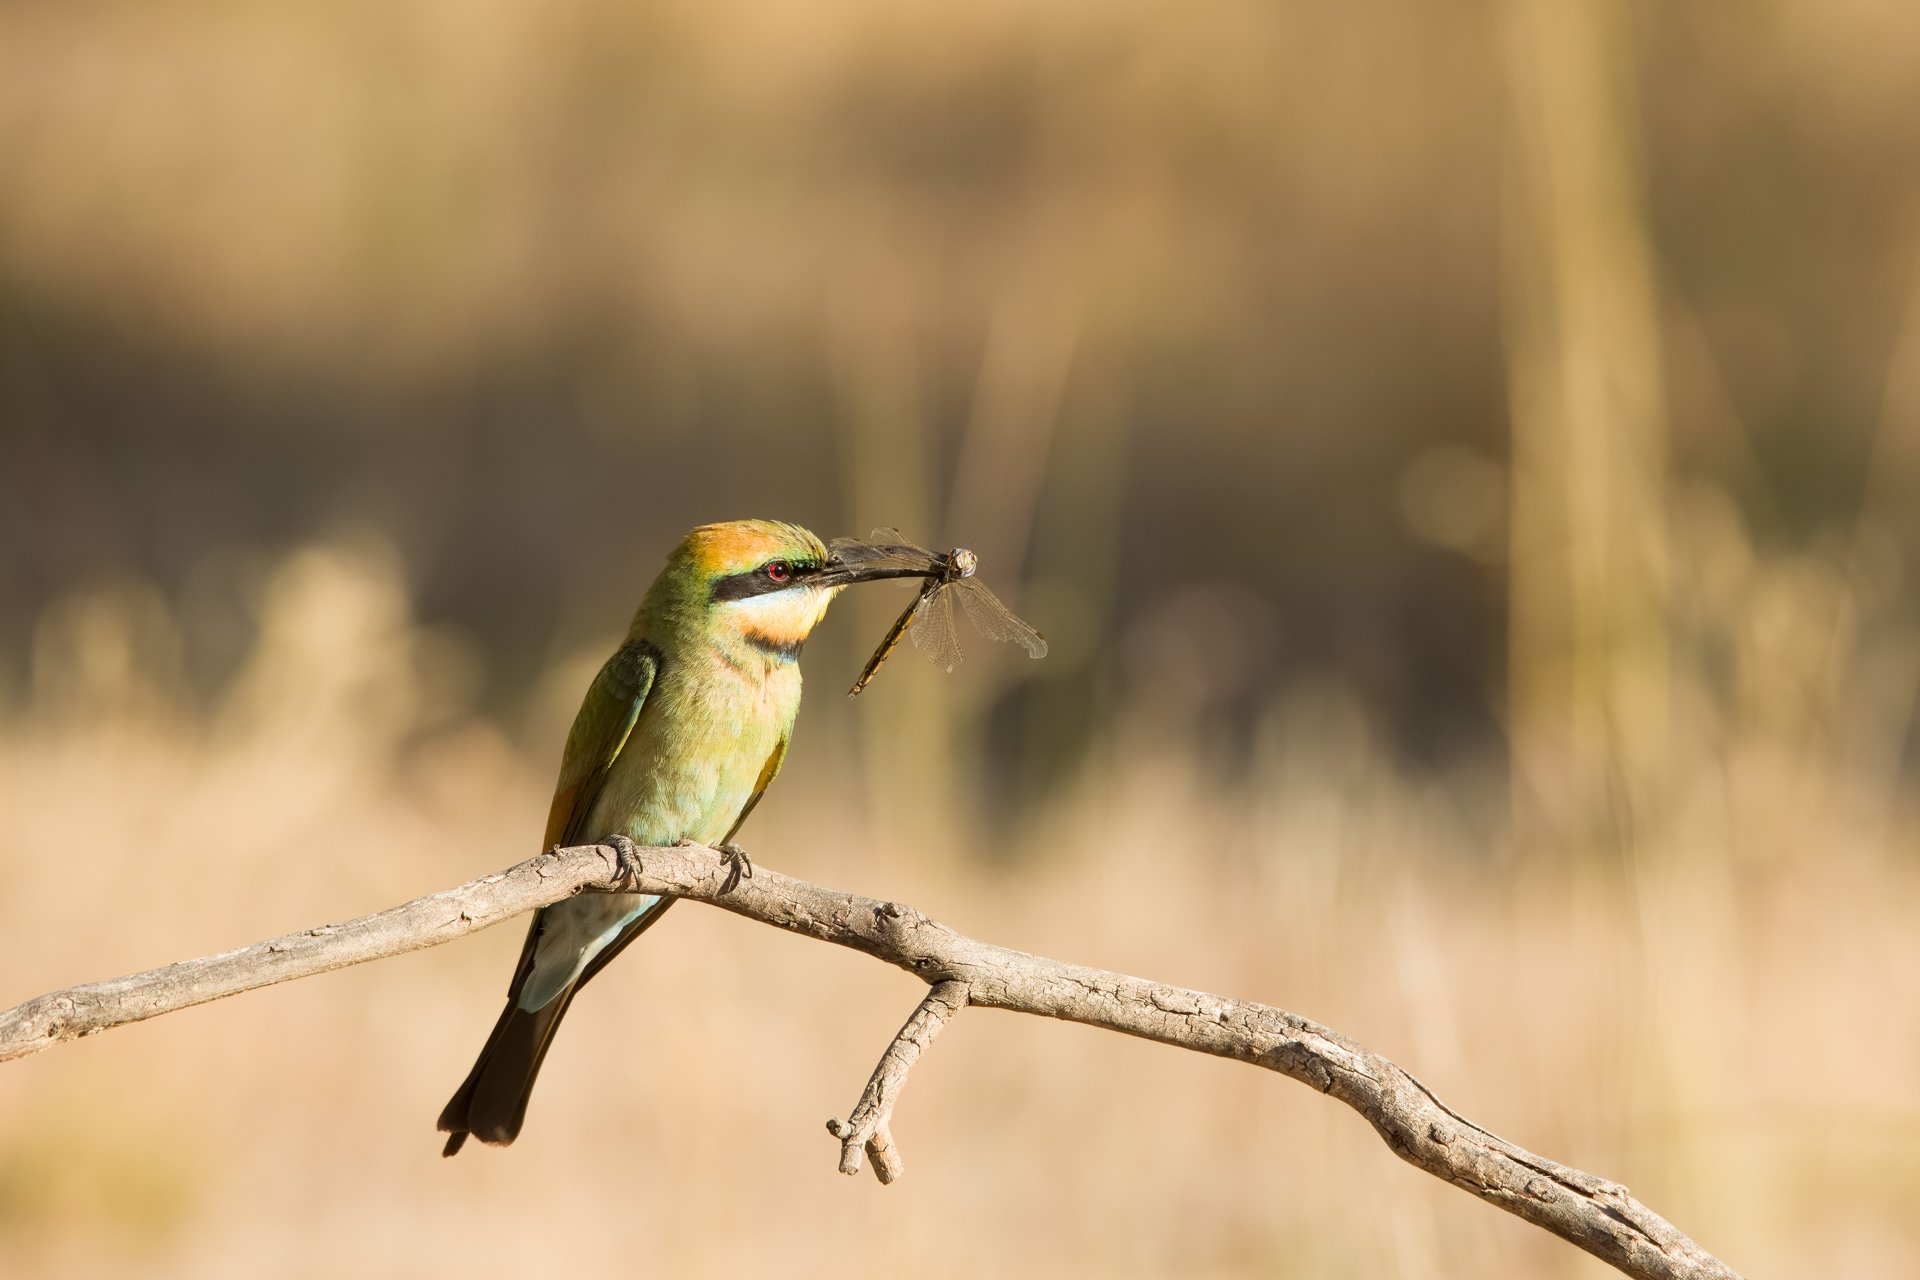
Quickly hearing and learning the patterns of the individual birds, we spent the next few hours capturing several birds coming back to the nest to feed their young. What a morning! What a great experience!
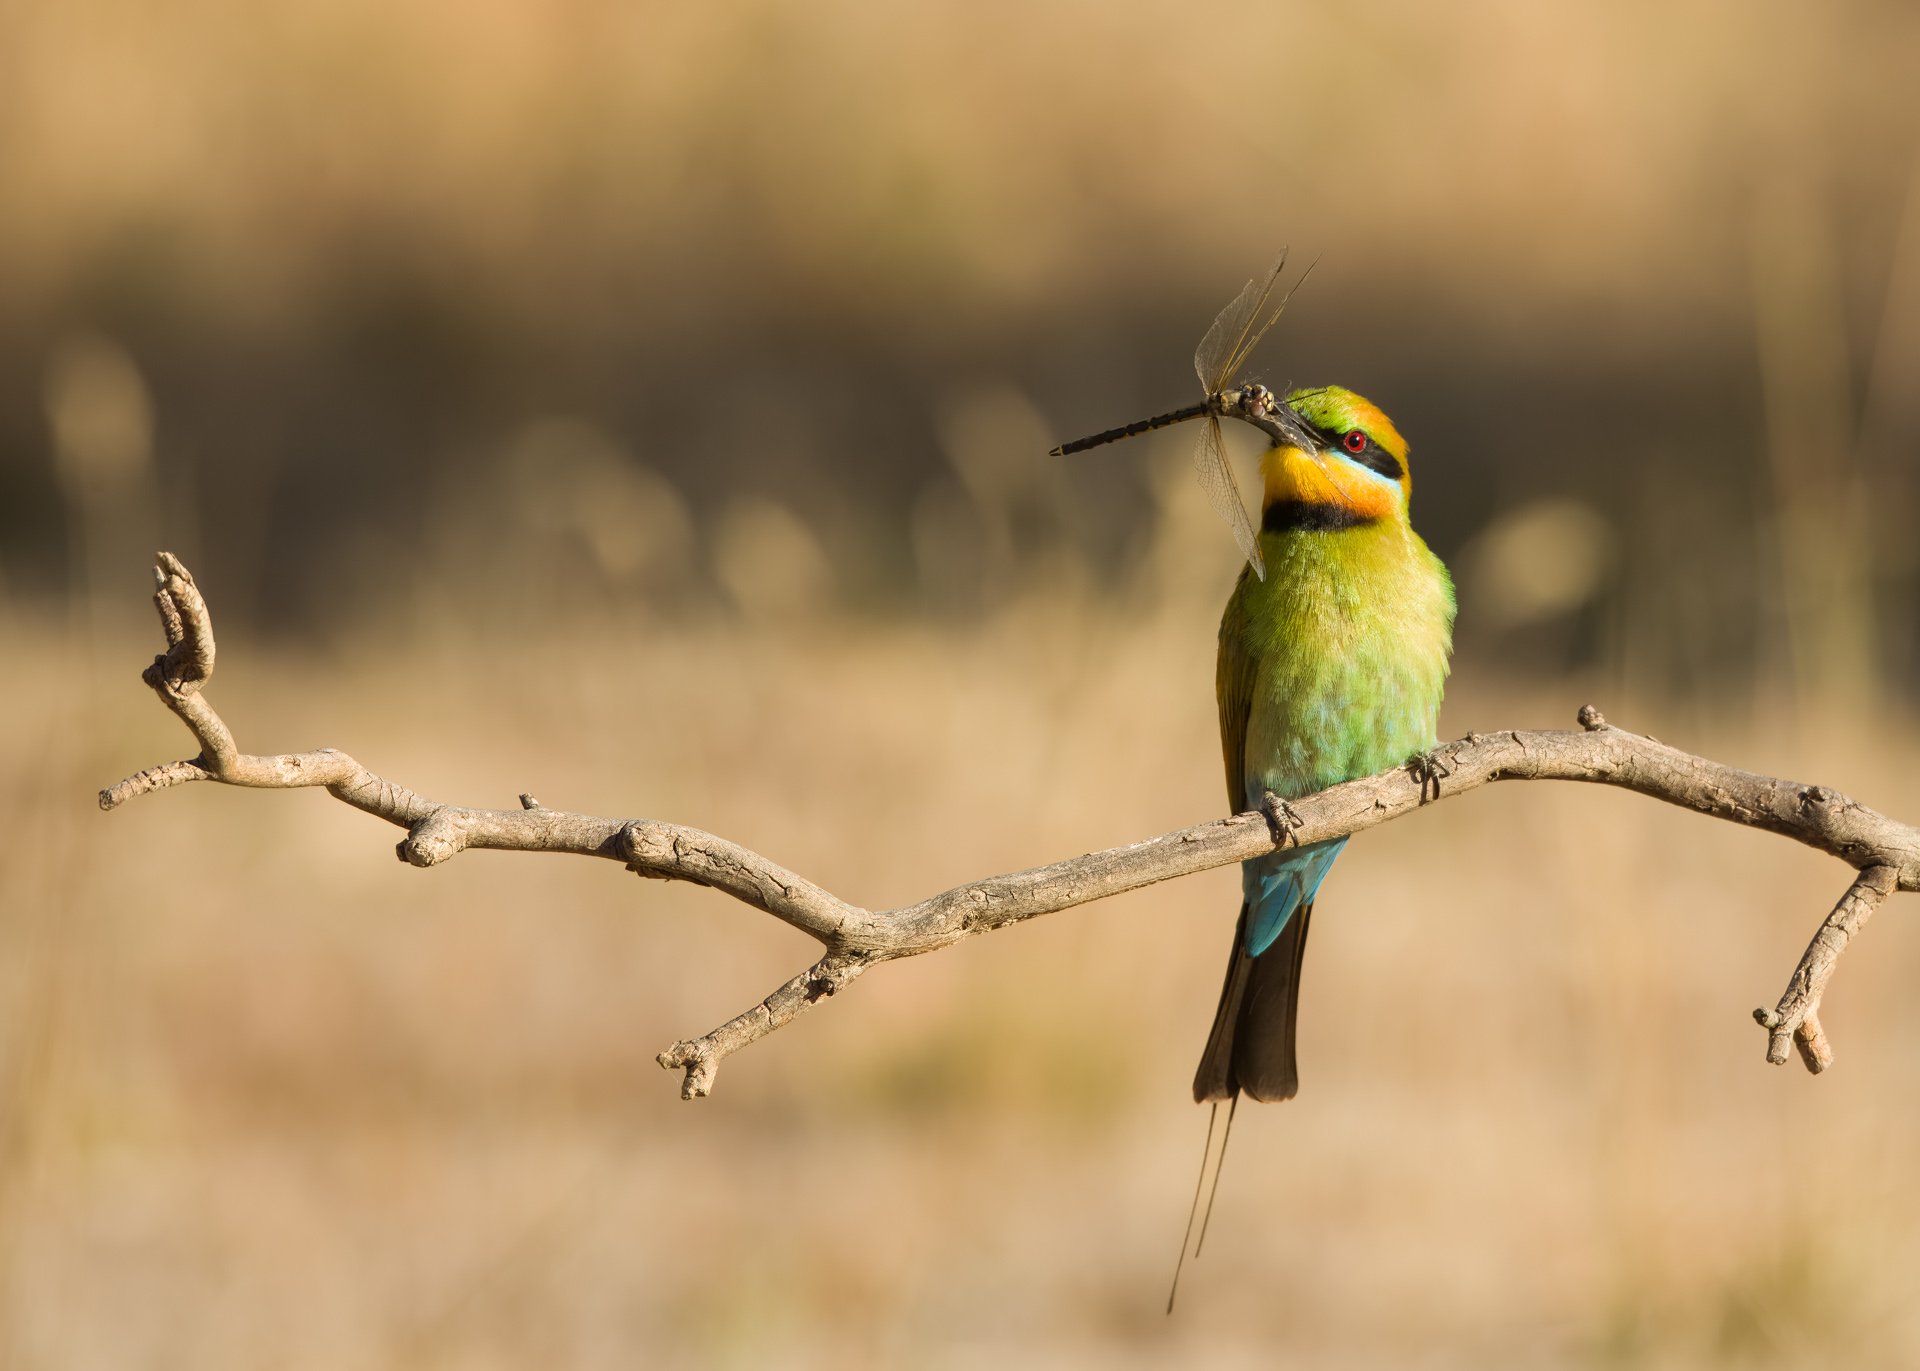
Soon enough it was time to exit the hide, leaving these little wonders to go about their day. I was on a high.
Thank you to the property owner for allowing access and to Craig for organising this experience. If you are a wildlife and nature lover like me, check out Craig’s website here - http://craiggreer.com/

Camera Rotation Photography
Delving into the camera rotation world after being inspired to put together a rough rotation rig. Humble beginnings of trialing a new(ish) technique for me, all about new learnings.
What is it?
-Camera rotation photography refers to the act of rotating the camera around its own axis while taking a photograph. This can be done manually by the photographer or using a tripod with a panning head. The technique creates a sense of movement and can be used to capture dynamic scenes or add visual interest to a static subject. It can also be used to correct perspective distortion in architectural photography.
A few years ago I dabbled with camera rotation photography, but quickly packed it away after not being able to put together a decent sturdy rig. At the time I wasn’t prepared to spend an amount of money on something that I probably wouldn’t do a lot of….
I continued to be in awe of the Light Painting artists using this technique and their work that is being created, knowing one day will be the time creatively to keep exploring and more importantly learning.
It was only recently after watching an interview with one of these artists, that the creative juices started to bubble again (see links below)..So I spent a morning pulling apart different tripod heads in the hope to make a rig that would hopefully hold my camera with no problem..
I proceeded to take some shots in the studio, and it seems to have worked! I’m actually looking forward to getting out into the wild and looking for scenes that will create a good rotation.
I’ll run through my initial setup, this is step one for me, and by no means perfect (or best practice), but as always, it’s a start. If you don’t start, you never will! LOL
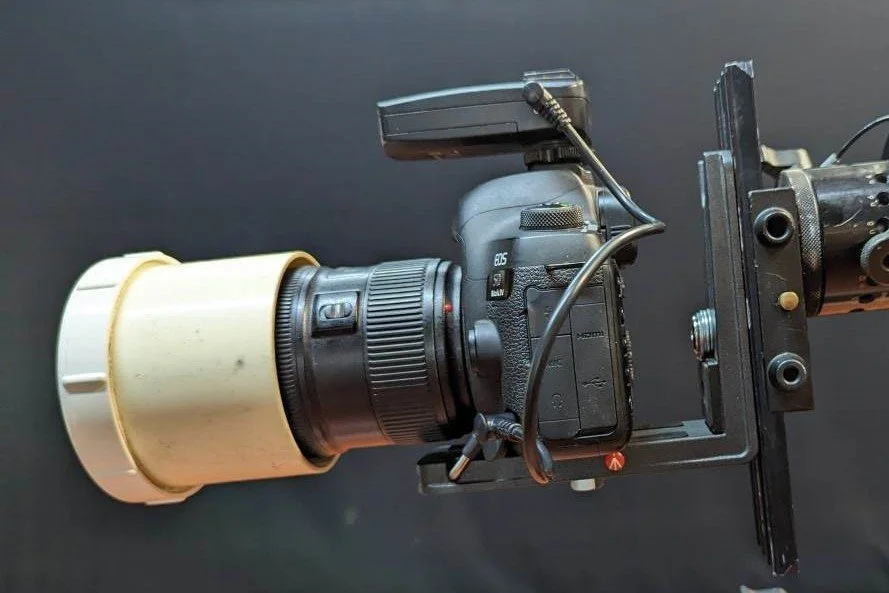
My very rough option for lens capping
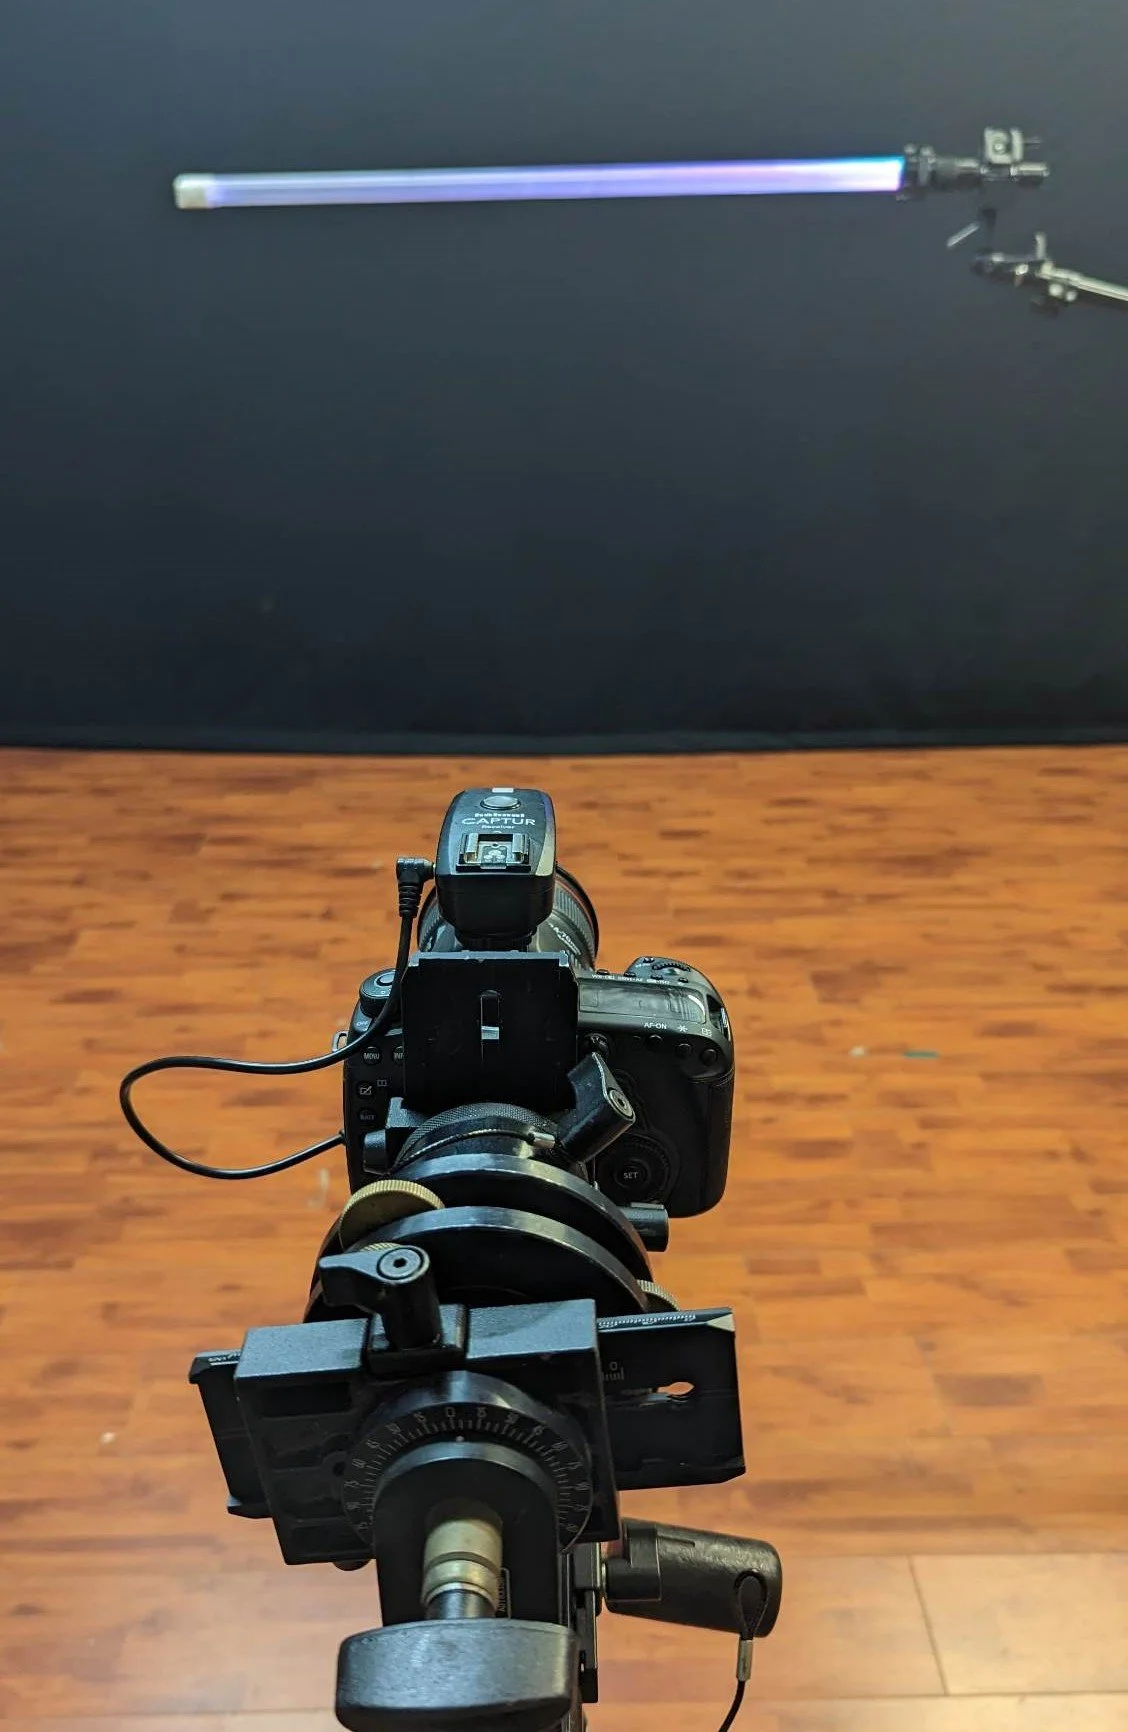
Setup for rotation, super simple for starting out. Tool is DIY acrylic tube. With KYO Tube

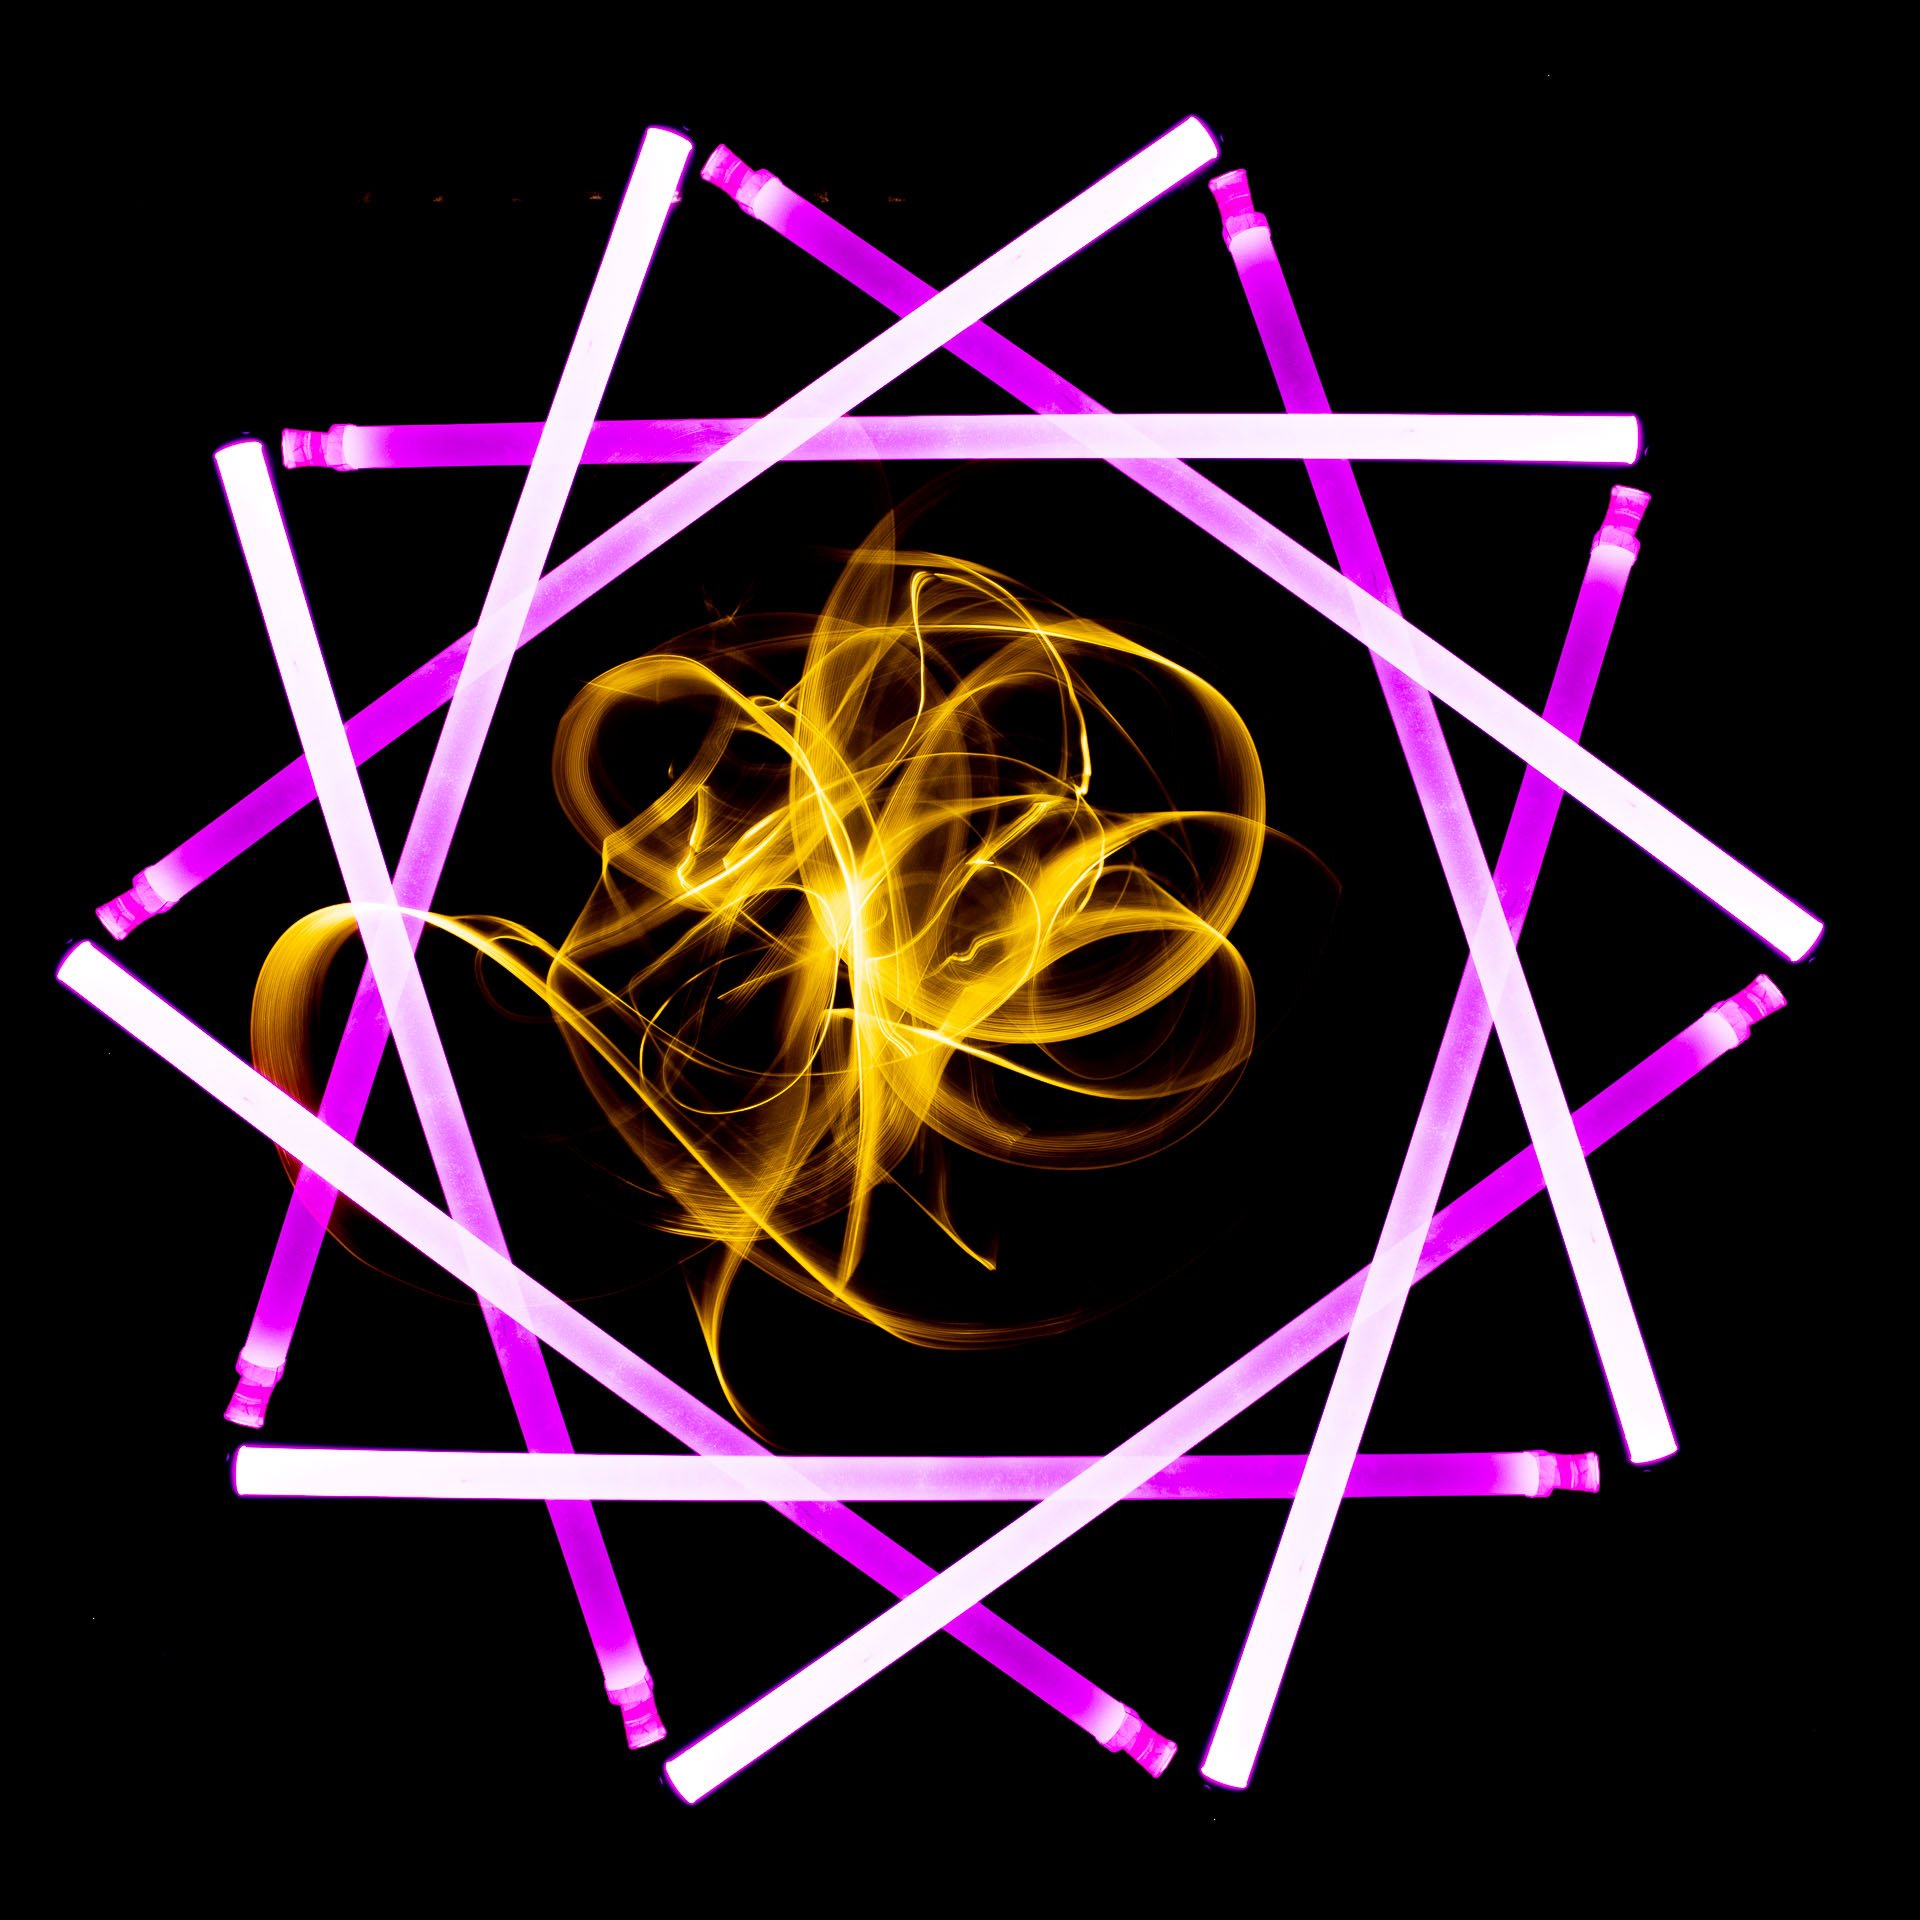
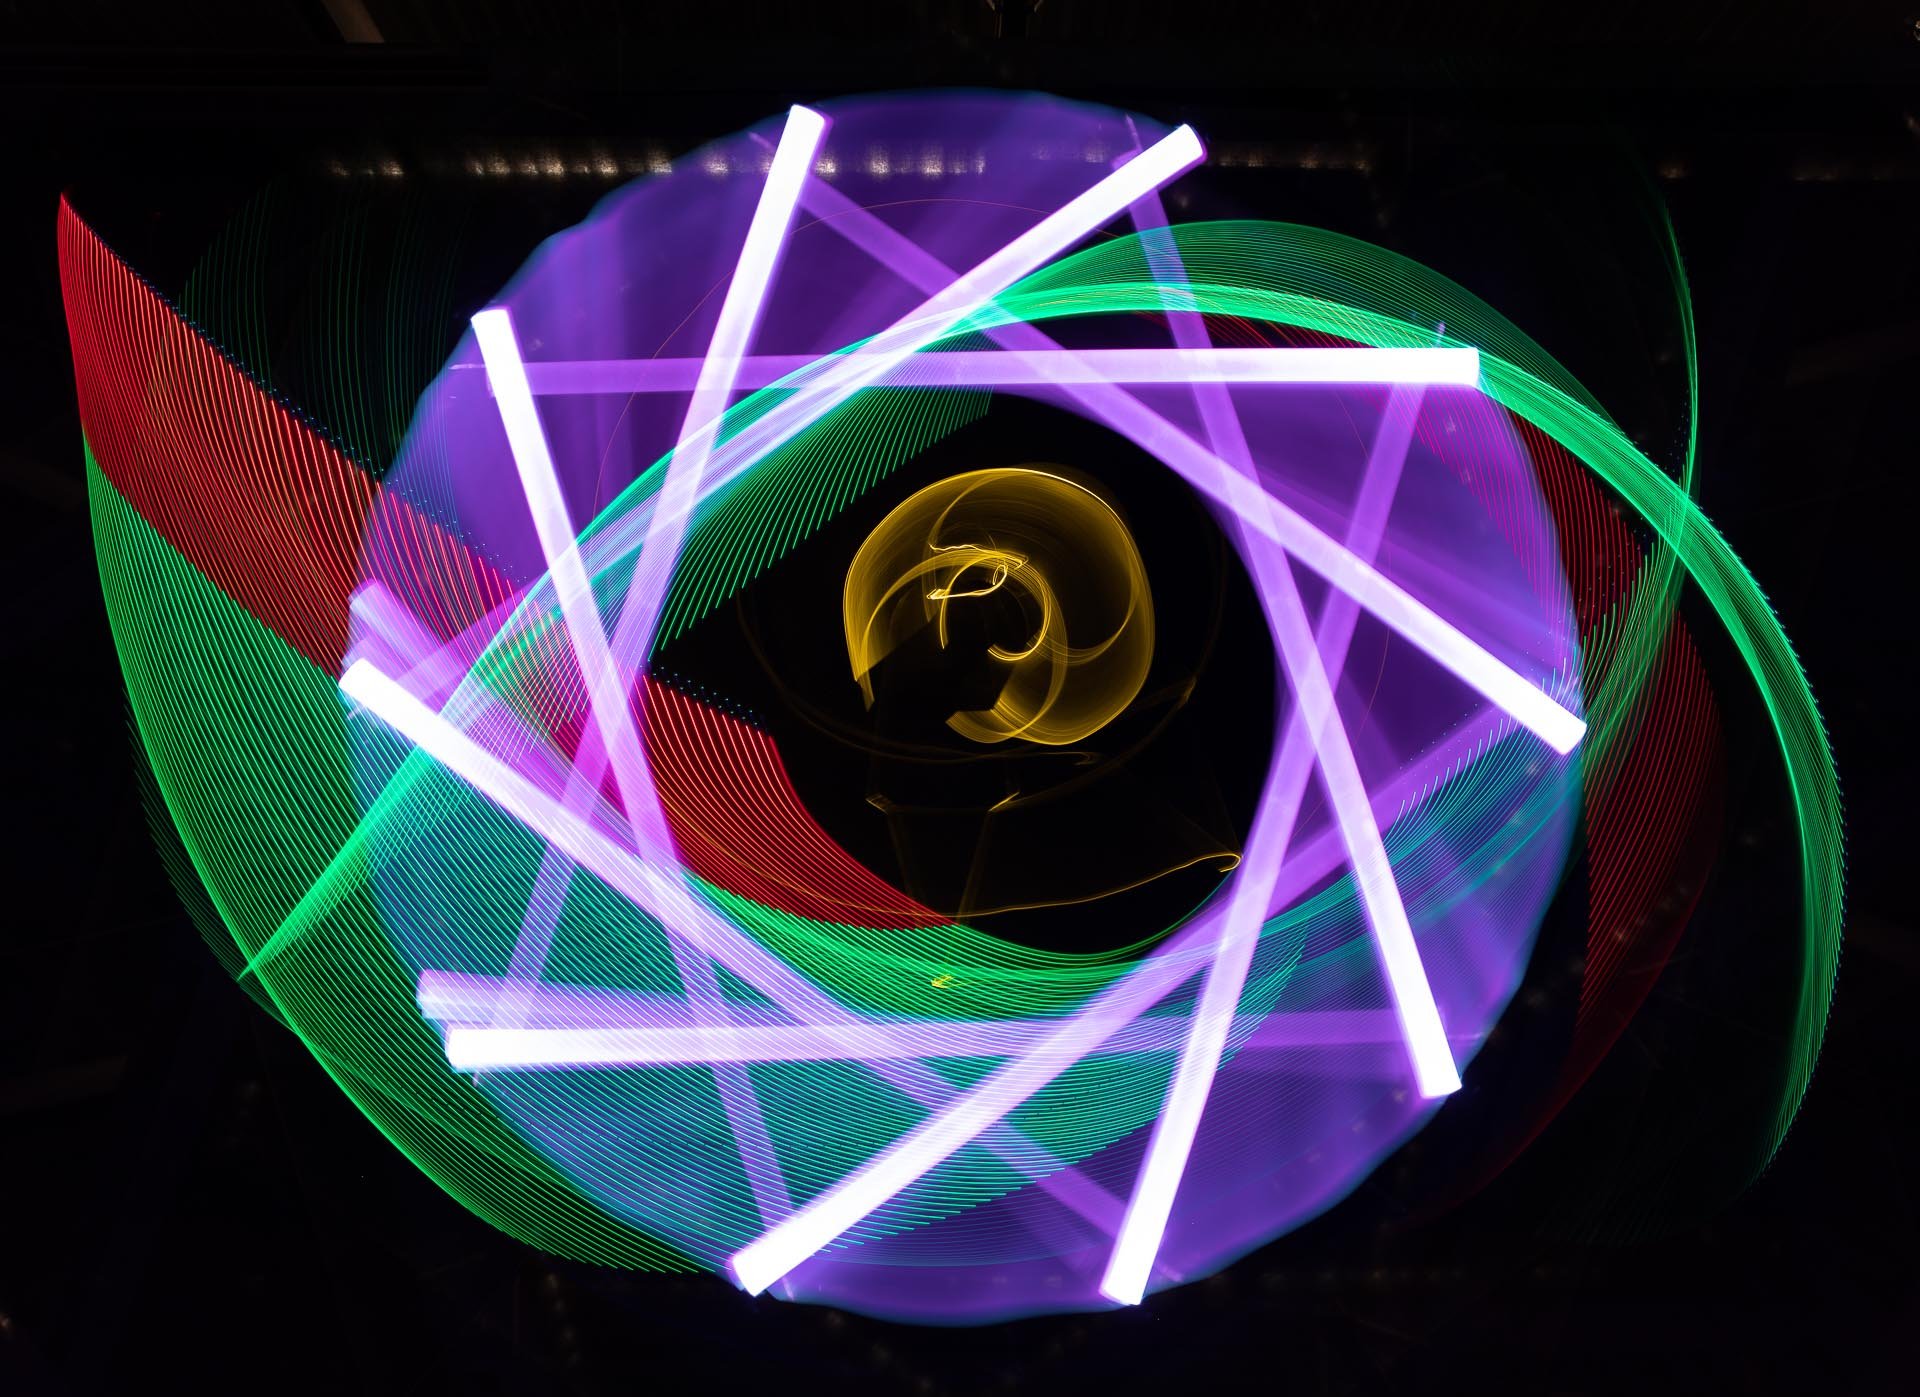
First image, a little Light Blading in the middle. Alignment check seemed ok at this point. Rotated at 72 degree increments.
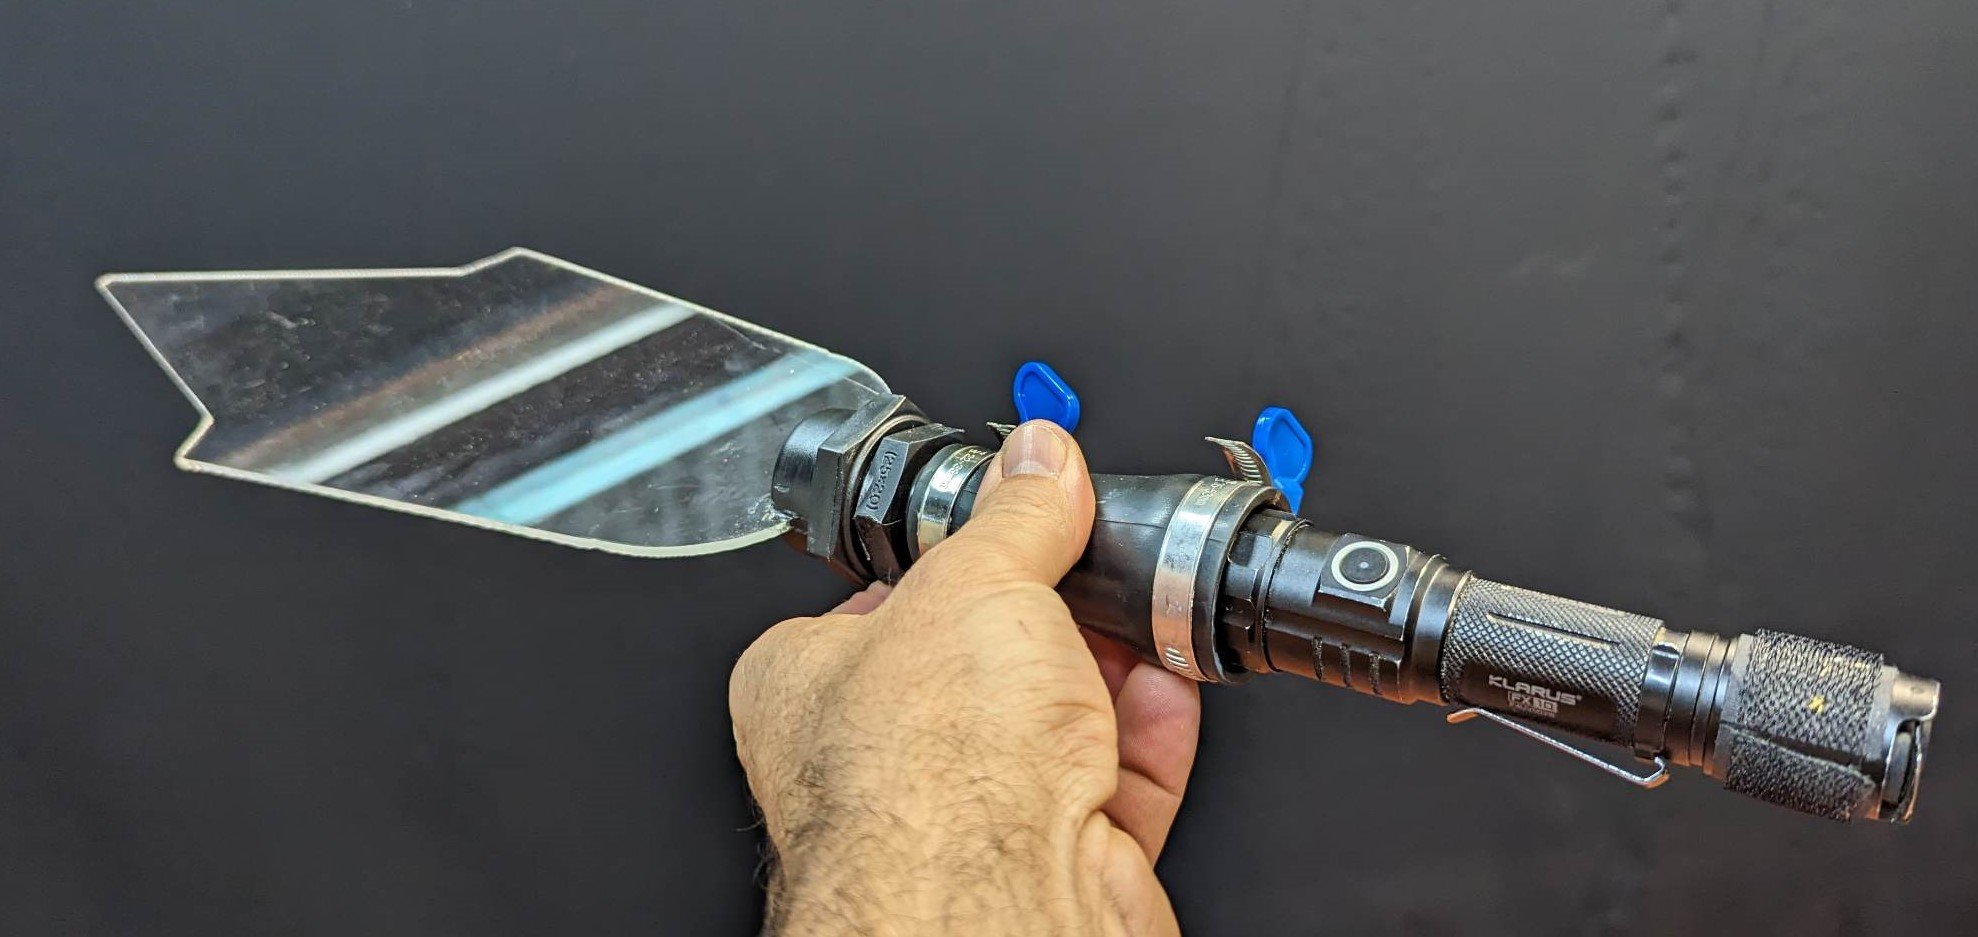
Blade of choice - Light Painting Au - Wedge. With Light Painting Brushes Universal Connector

DIY Bluetooth LED bow
My method that seems to work ok…
1) Settings ISO100 F/9.0 Bulb (5 minutes on timer)
2) After aligning the tube tool with roughly the top of the frame, rotate and check the tool stays somewhat in the frame through the whole rotation.
3) Take a test shot,(I used the remote beeper for this)after three beeps/seconds cap the lens and rotate to the next position. Repeat until at the final position and stop the shutter. Check alignment - does it resemble an even shape?
4) Take more shots! I did the rotations first, then capped while getting the Light Painting tools sorted out. Uncap and Light Paint as you please.
5) Stop shutter
6) Repeat and have fun
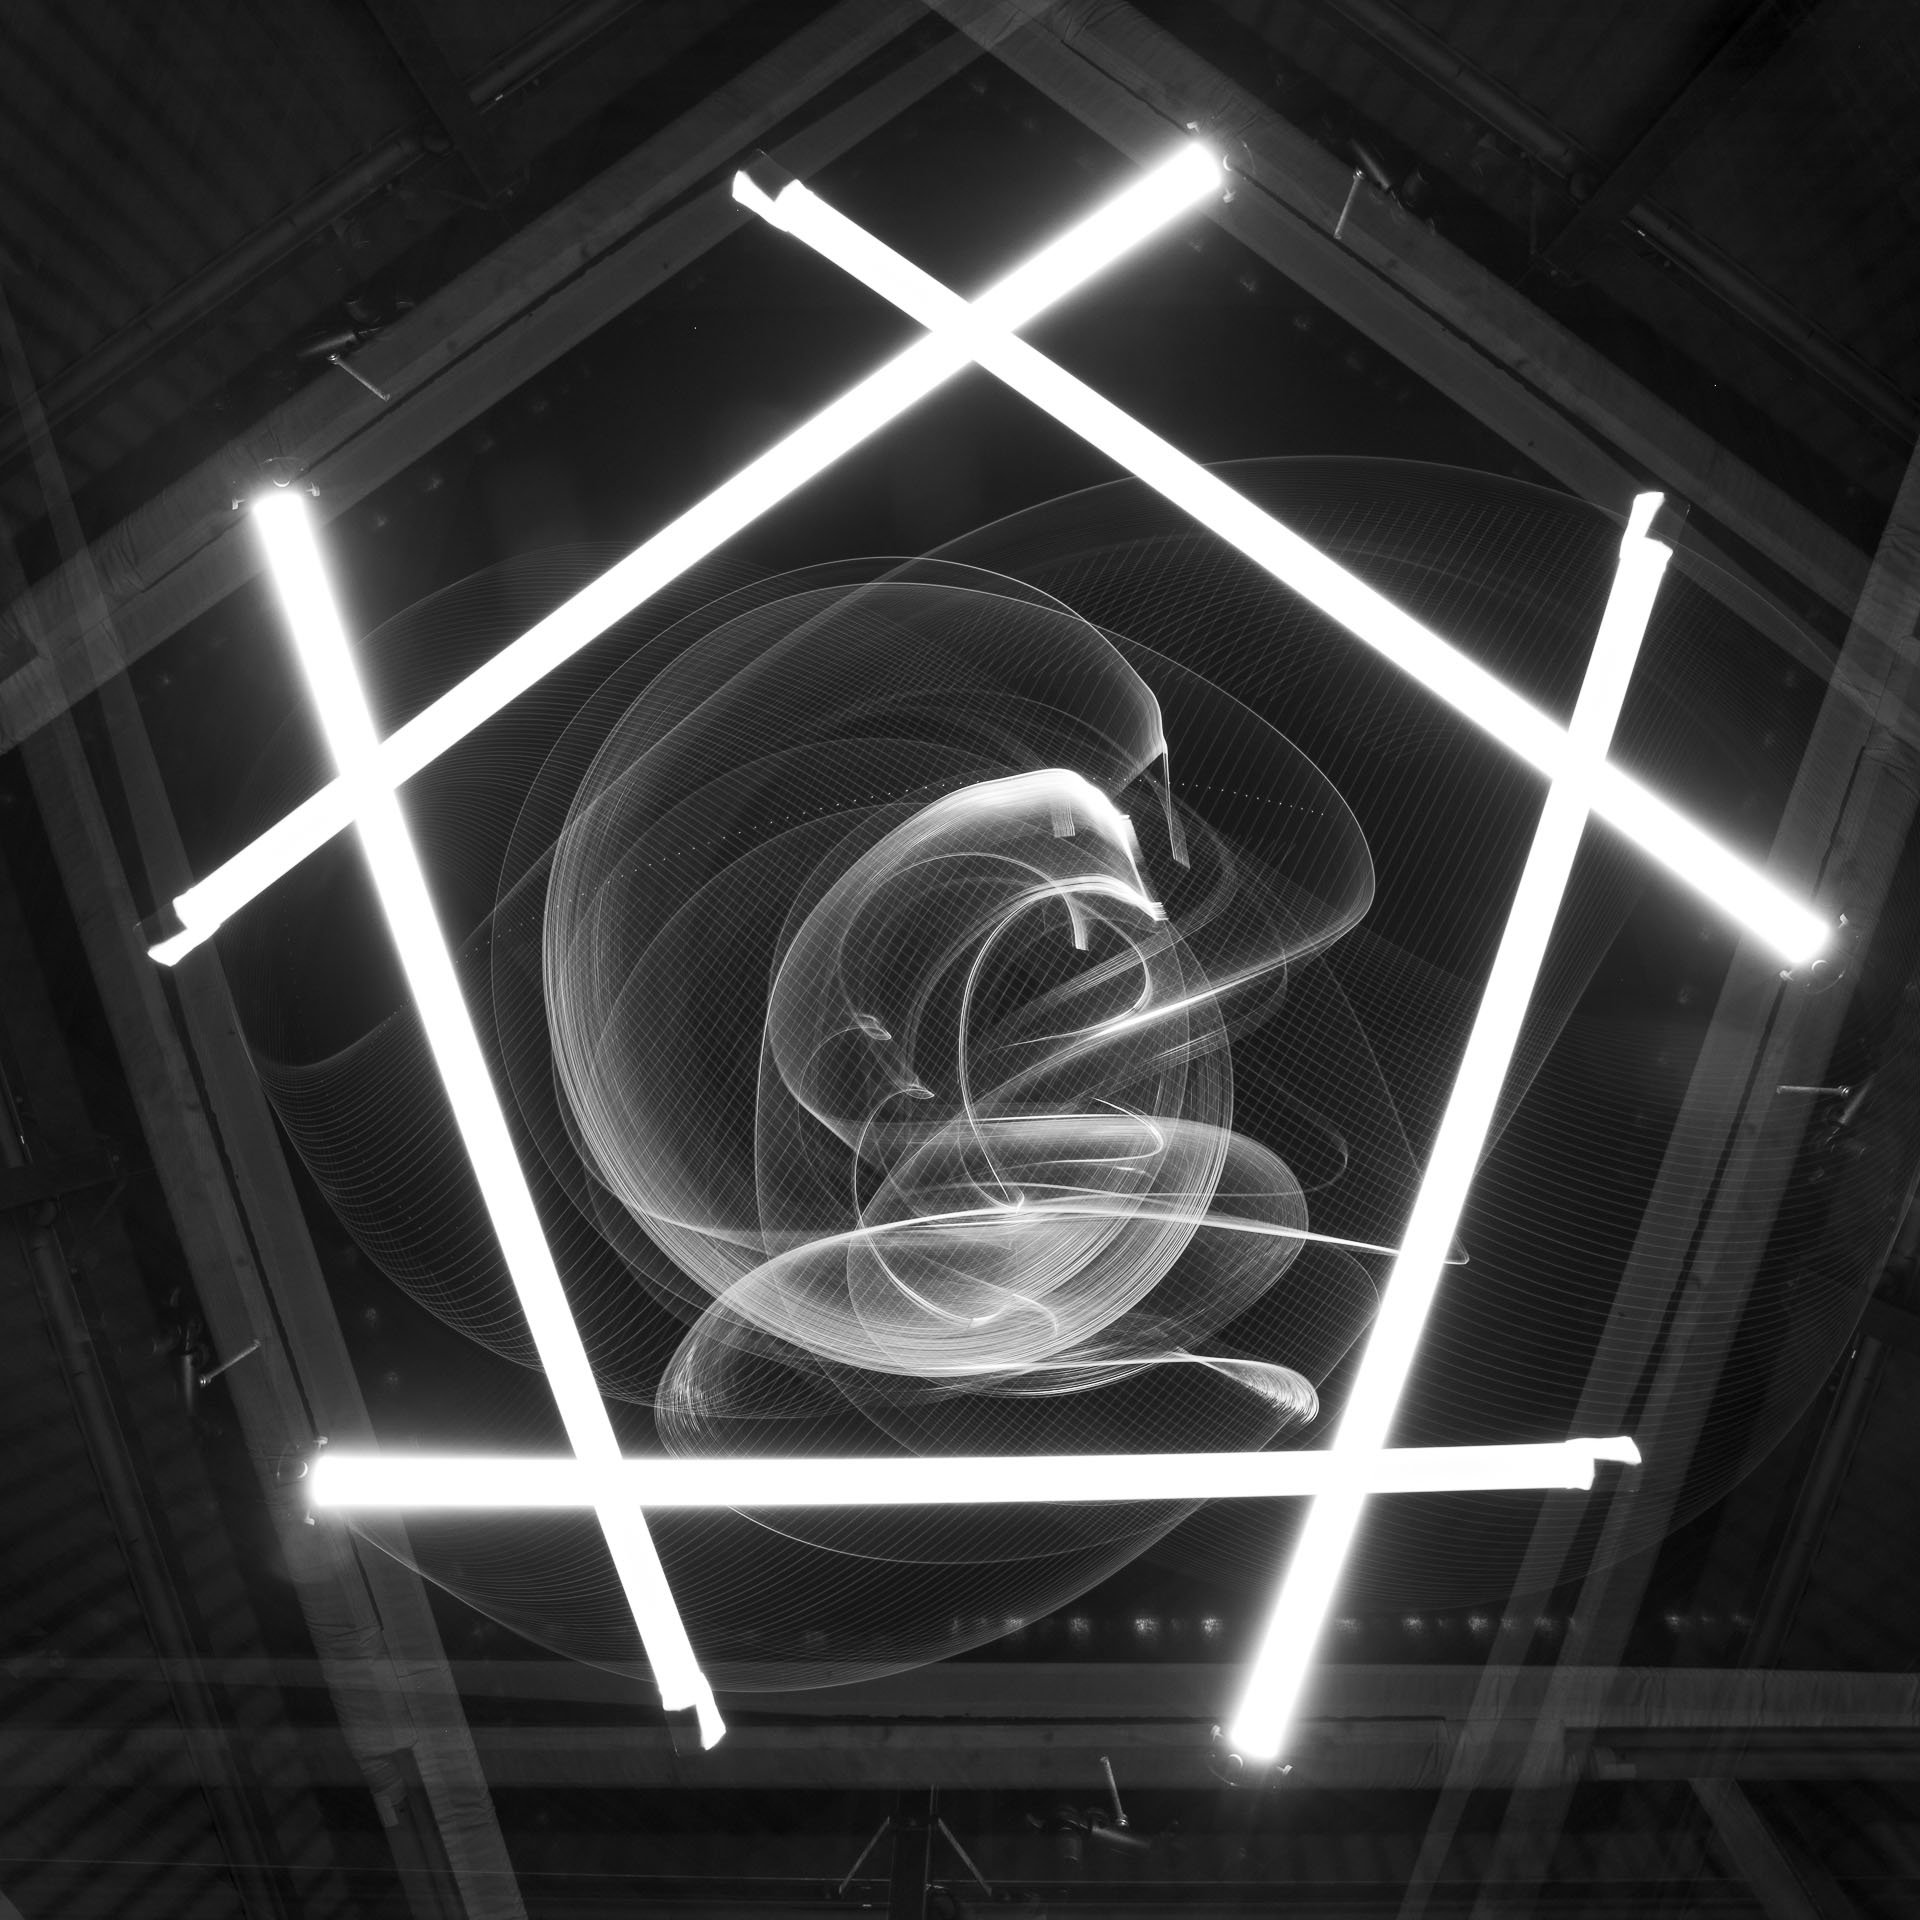
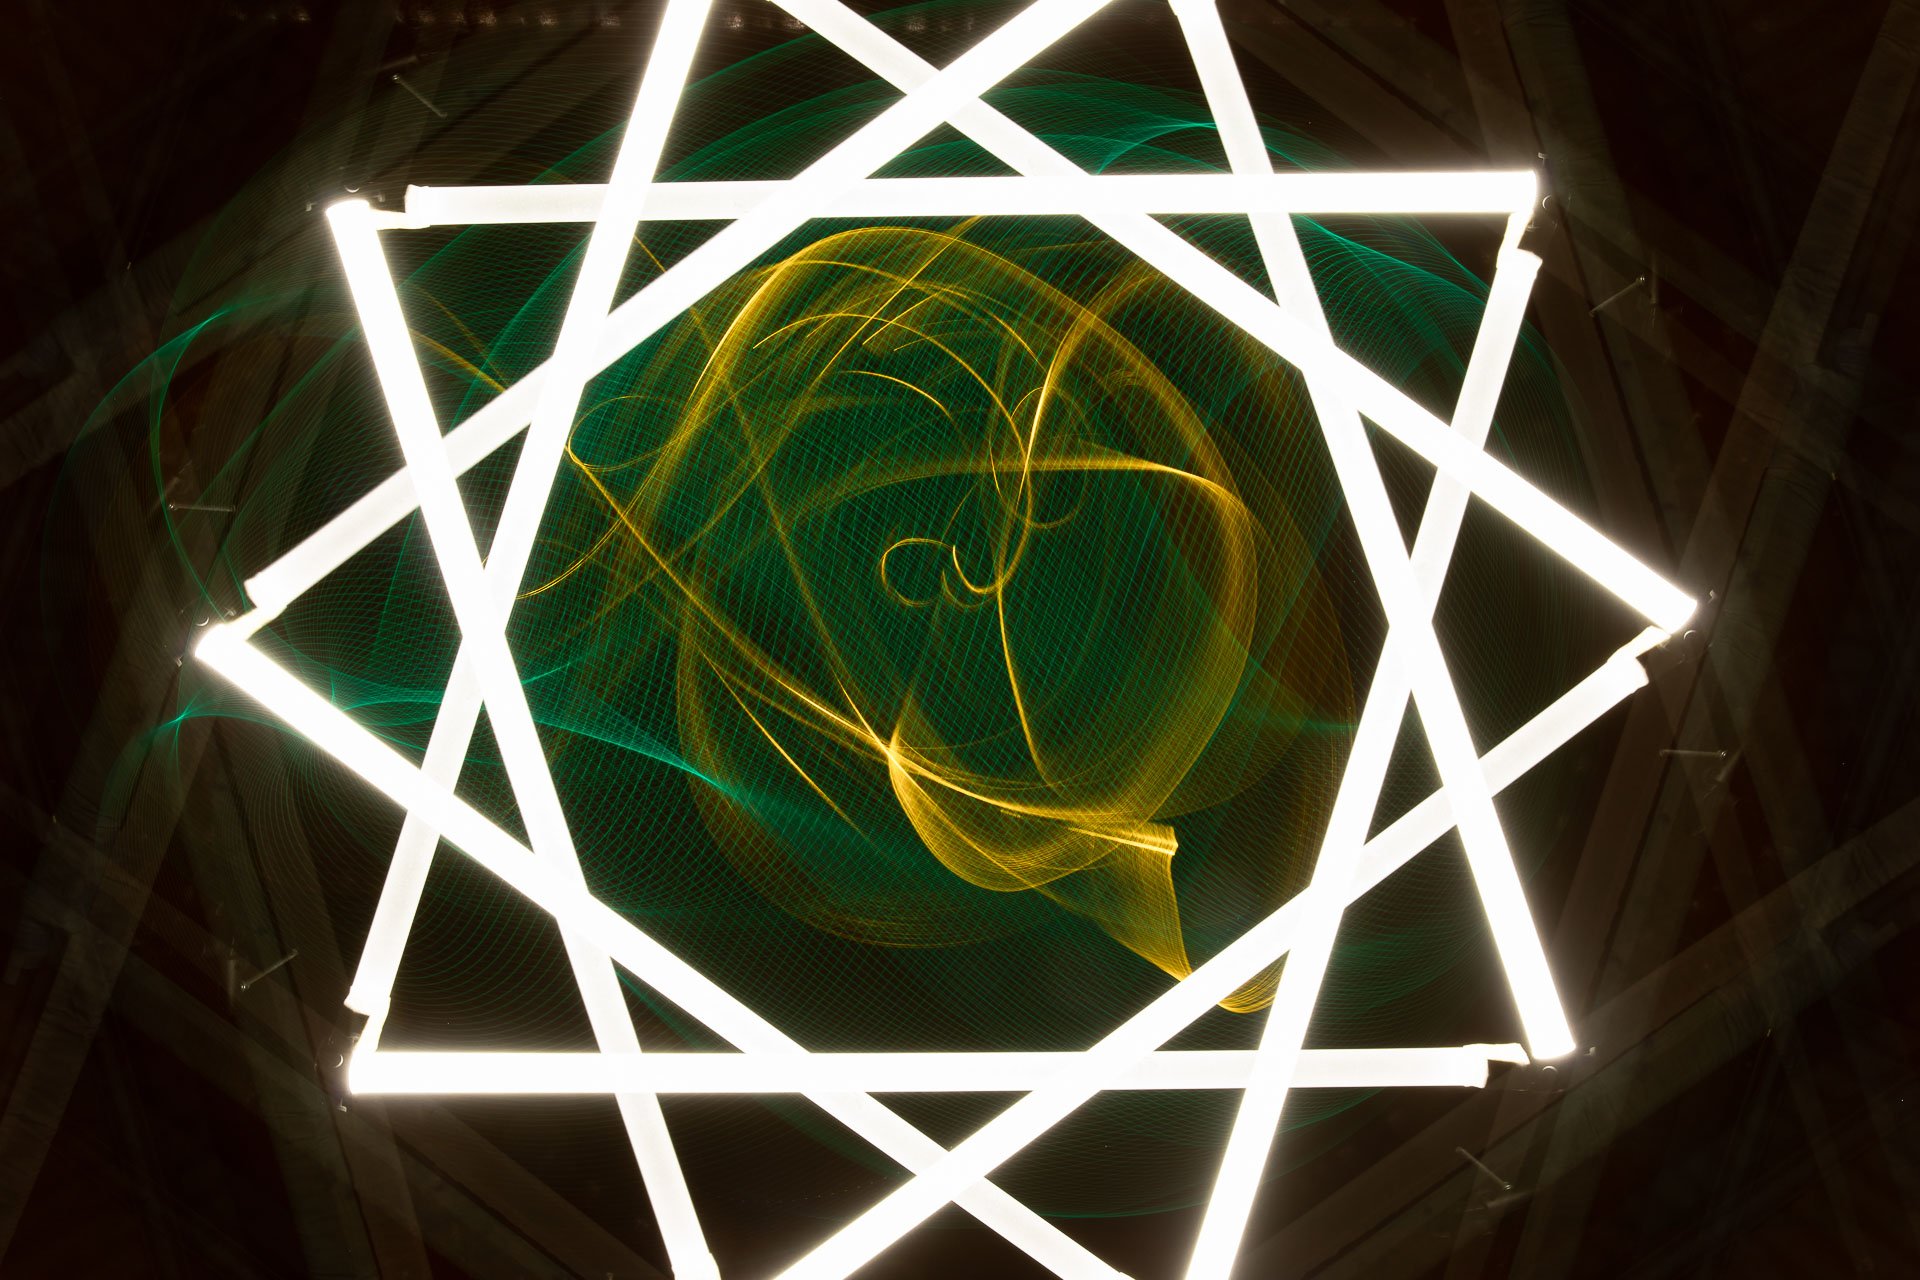
I found that rotating at 36 degree increments worked well for what I wanted, this would change depending on the scene and what outcome you wish to achieve. This was a pretty short session for me just to get started and I’m hoping as this project develops that I’ll add to this blog to update my learnings.
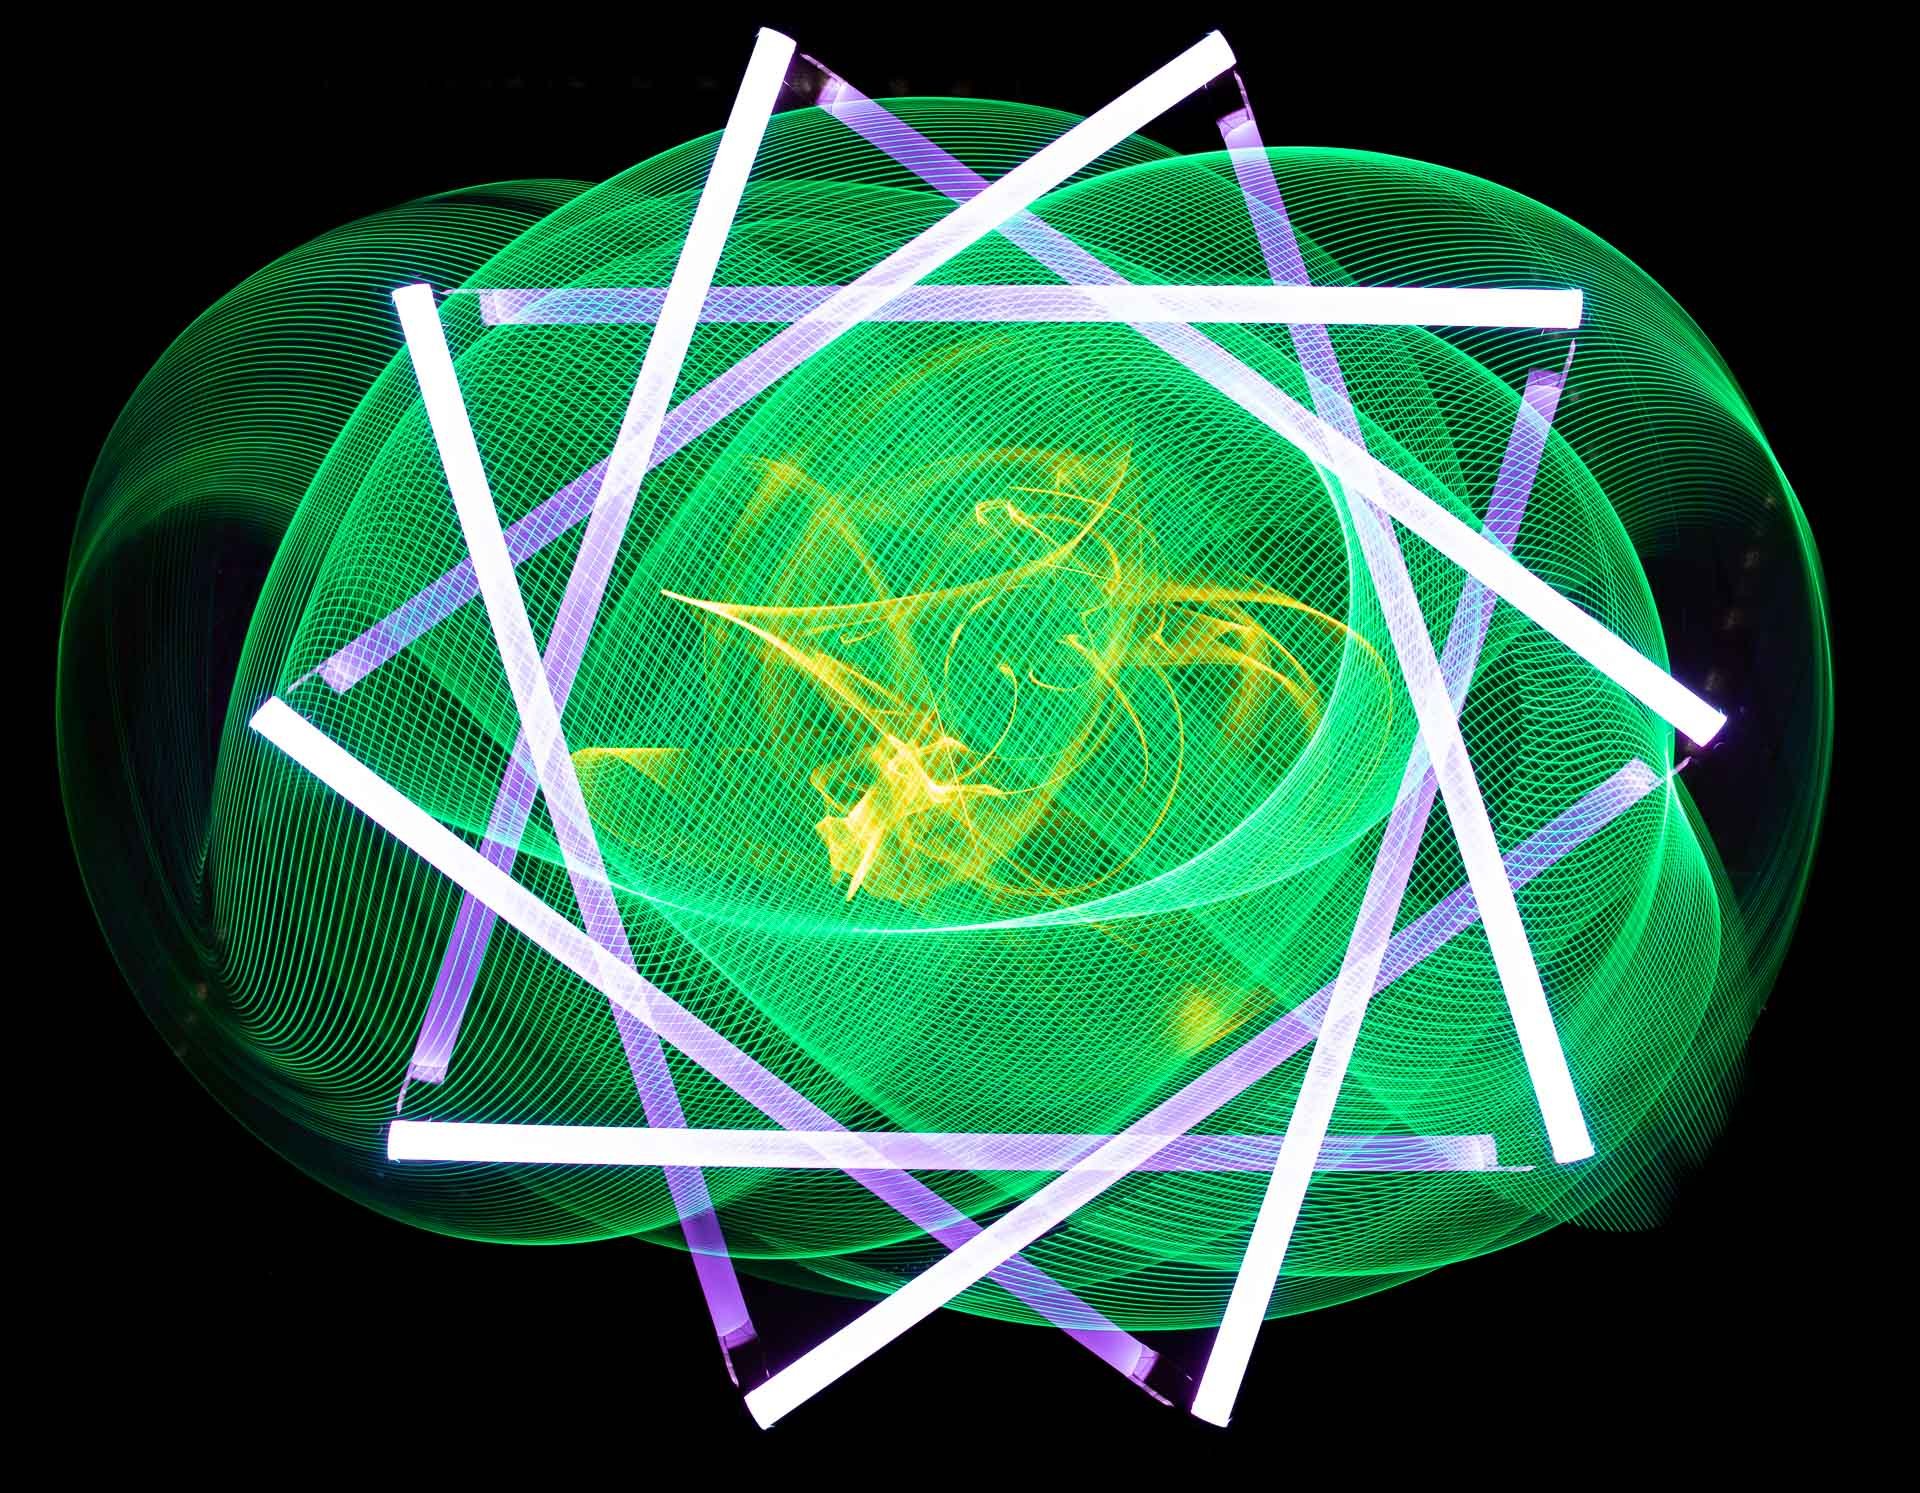
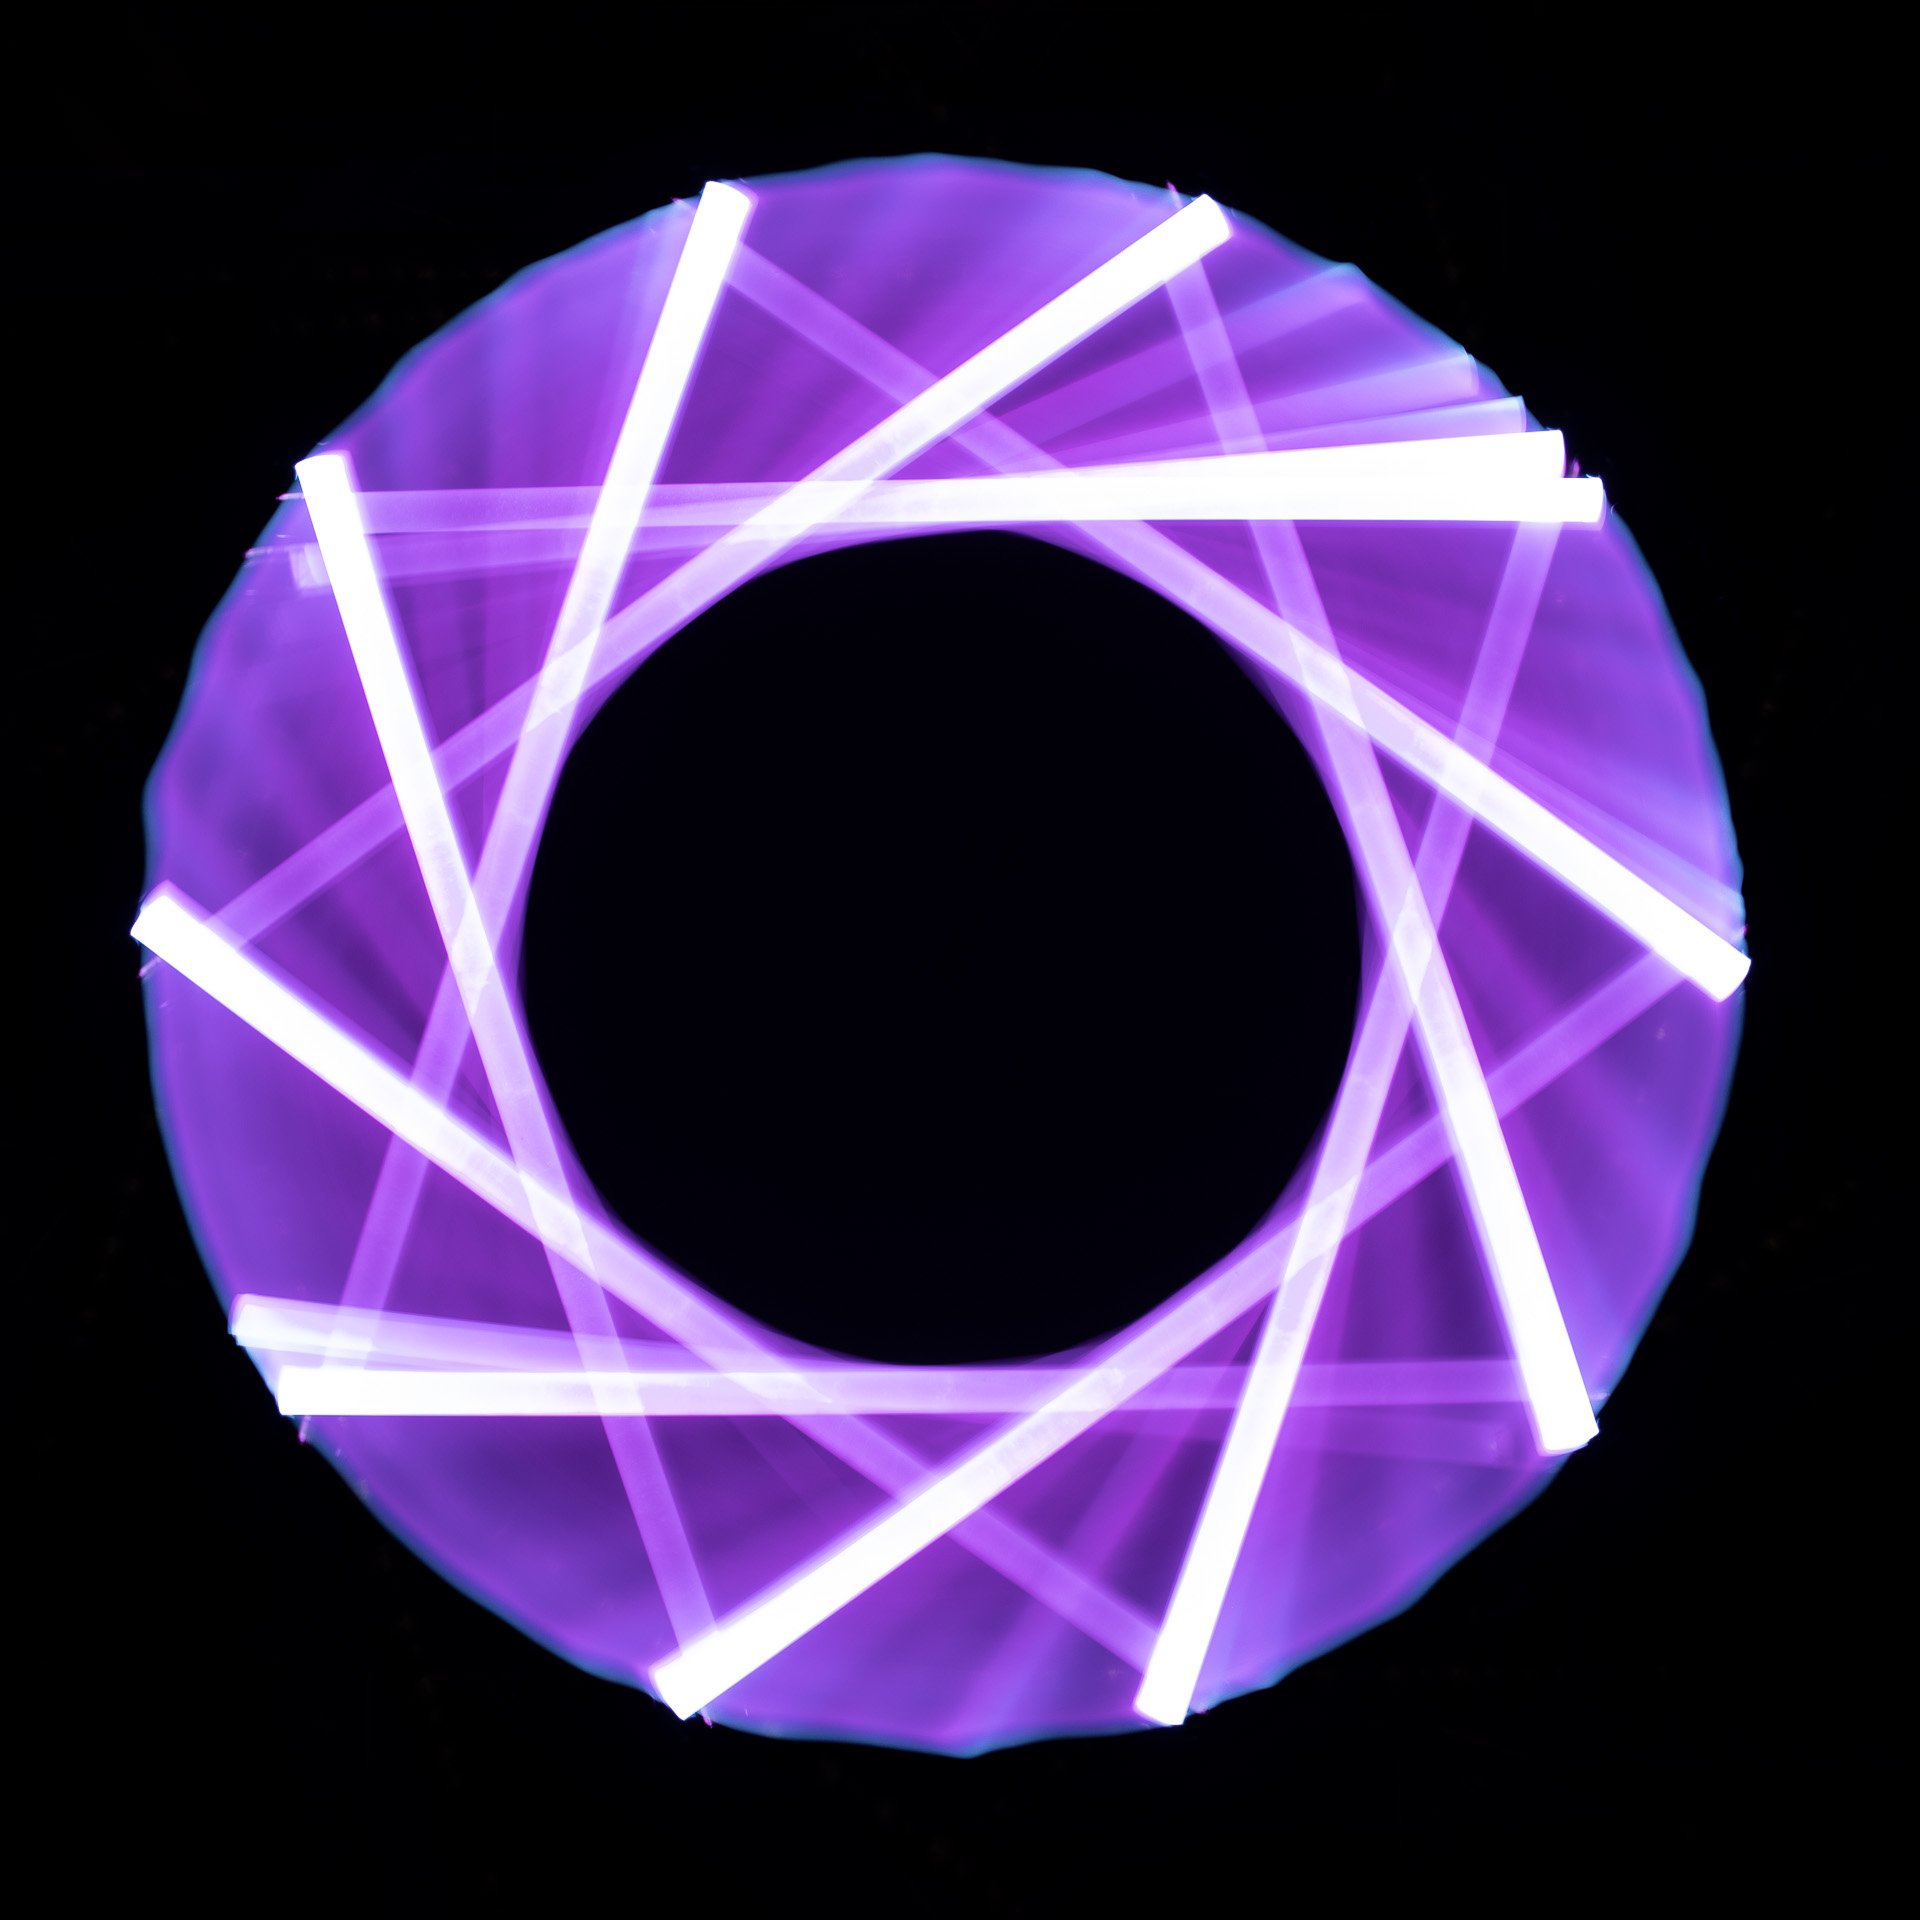
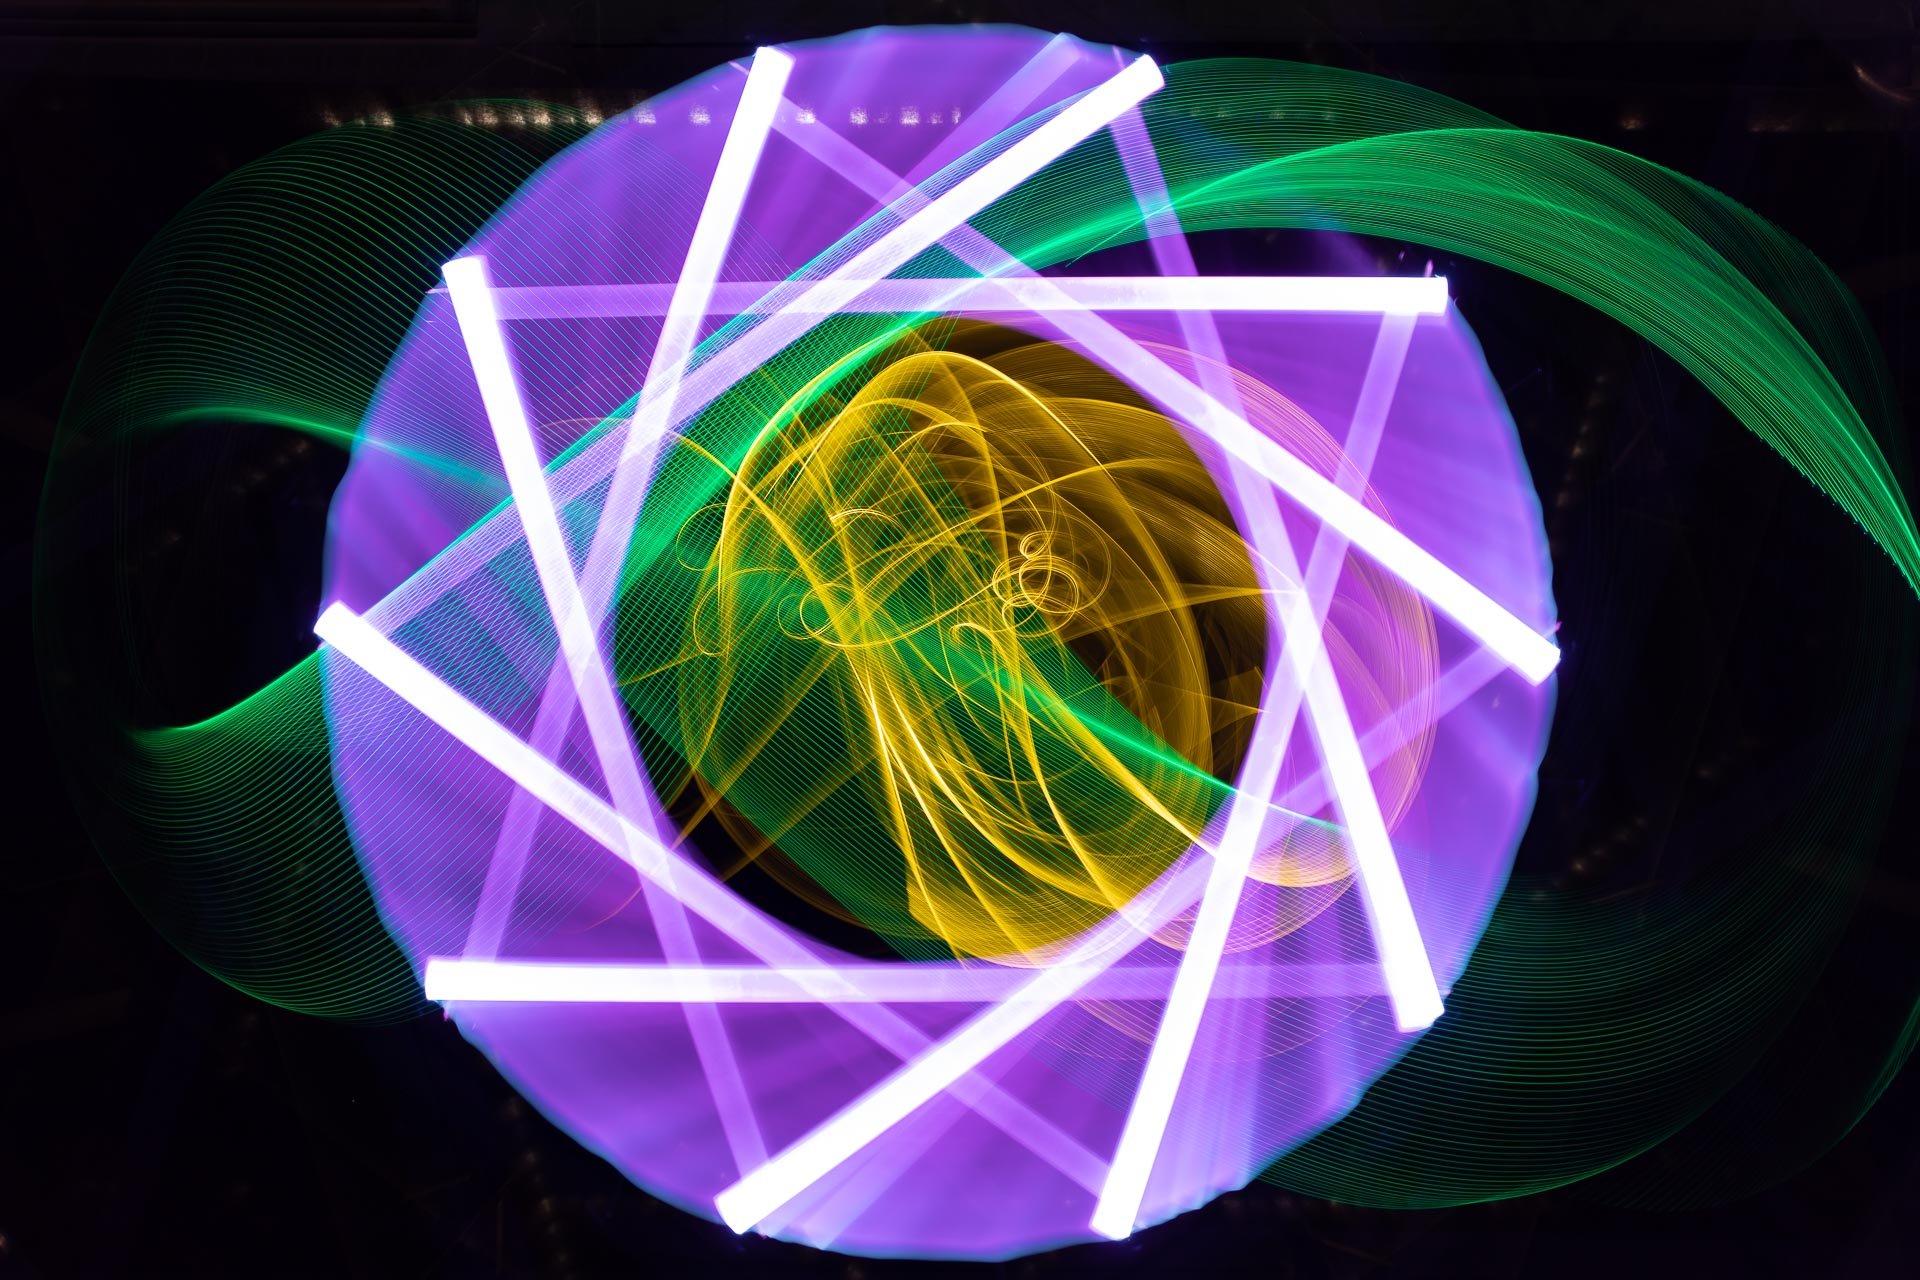
A few results from the session:
Inspiration
I always like to give a shout out to my main inspiration when giving something new a go. I feel this is a great part of the Light Painting culture that shows appreciation to the artists that have shared and therefore sparked the creativity.
A few Light Painting artists (to name a few) that use this technique, check them out